Black Lagoon Chia Pudding!
Happy Halloween my little spooks! I hope you love and enjoy this holiday as much as I do - dressing up in costumes, eating ALL the candy - its one of my favorite times of the year! I love celebrating by decorating the house and making as many "Fall-themed" foods as I can during the month of October. This year, after making all the banana bread and pumpkin cookies, I wanted to make something spoooooky and worthy of being served up Halloween itself! I created this easy, fun recipe as a way to take your love for Halloween to the next level. Not only does the chia pudding look super swampy and like a monster from the Black Lagoon might come crawling out, it actually tastes great (like vanilla!) and is packed with good-for-you nutrients like fiber, iron, calcium + omega 3's. The perfect way to sneak a little HEALTH into your belly between all the tricks and treats!
This recipe whips up in minutes and is ready after just a couple hours in the fridge - meaning you'll have just enough time to get costume ready before you slurp down this swampy goodness. It might make your teeth and tongue a big blue-ish hued, but that just adds to the un-dead-ness of it all! Leftovers save easily in a sealed container in the fridge for 3-4 days. Best served with a little blood red fruit. 😉 Scroll down for the recipe - and printable version!
INGREDIENTS:
1 1/2 cups unsweetened almond milk 1/3 cup chia seeds 1-2 tablespoons maple syrup 1 teaspoon vanilla (or skip the maple syrup + vanilla and use a few drops of vanilla stevia to sweeten instead) 1 1/2 teaspoons charcoal powder (about 6 charcoal pills, emptied) DIRECTIONS: Whisk together the almond milk, chia seeds, maple syrup, vanilla and charcoal completely in a large glass jar or bowl. Cover the container and place in the fridge for 4+ hours, stirring or shaking occasionally to check consistency and make sure charcoal has uniformly distributed in the pudding. The color will darken slightly as it sits. When ready, simply serve as is or with some blood red fruit and optional granola. Can be shared with vampires and ghosts. Leftover last in the fridge for 3-4 days, unless your ghost friends get to them first. Enjoy!
0 Comments
Wild Blueberry Overnight Oats
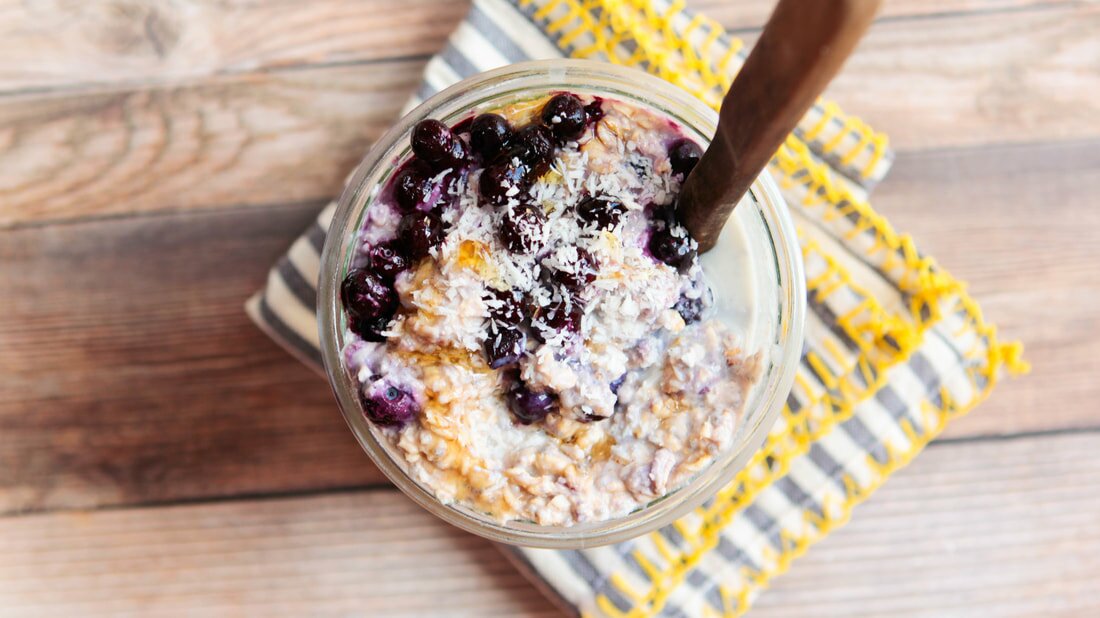
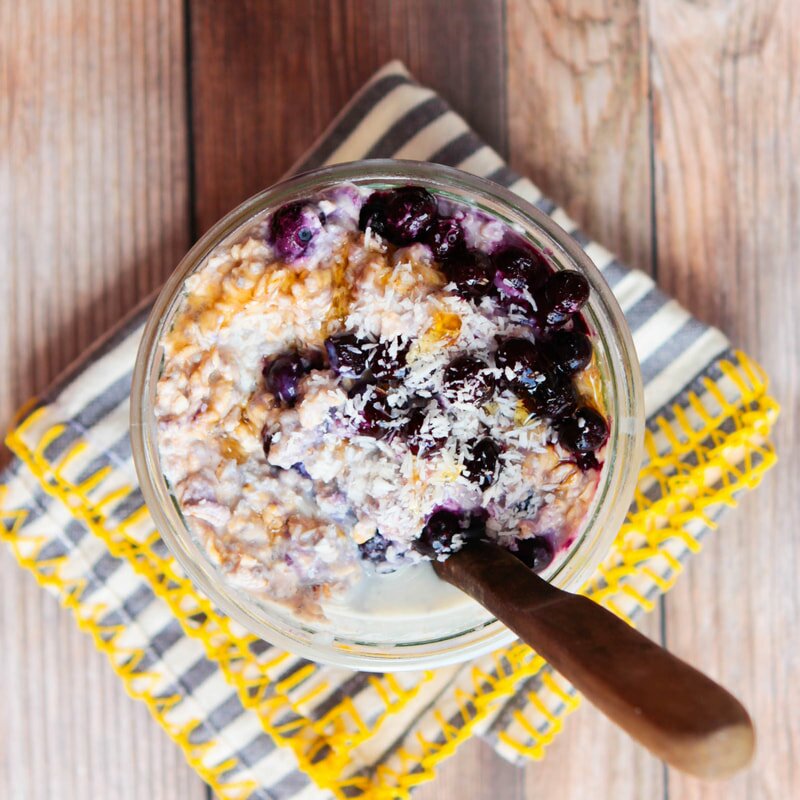
This is a super simple recipe, but sometimes those are the best recipes. I get into food moods all the time, and lately I've been super busy and hooked on easy, on-the-go breakfasts and lunches that pack some real nutrition and can keep me filled up when I have to teach back to back classes with no snack time in between. Being a Maine girl at heart my berries of choice were of the small, tart, and wild variety - but you can sub in whatever fruit or berries you prefer here, instead. The addition of coconut butter adds healthy, hearty, good-for-you fats that'll help keep you moving and the chia seeds add just a little extra texture (and a whole lotta omegas!) to the mix. All you'll need is a few simple ingredients that you probably already have on hand, a glass jar, and a serious appetite. Let's eat!
Before you make your way down to the recipe, a quick reminder that I'm currently teaching 4x a week at CorePower Yoga in Brea, if you're looking to get your sweat on - and soon will have my own yoga vids for you guys to access on my YouTube whenever you need to flow! Send me your flow requests and I'll try to make them happen. Alright - keep scrolling!
INGREDIENTS:
1/2 cup almond milk 2 teaspoons chia seeds 1 tablespoon coconut butter (or nut butter of choice) 1 tablespoons maple syrup 1/2 cup (GF) rolled oats 1/2 - 1 cup wild blueberries (fresh or frozen) DIRECTIONS: In a mason jar or small bowl, combine the almond milk, chia seeds, coconut butter, and maple syrup and stir or shake to combine. The coconut butter doesn't need to be completely mixed with the almond milk - and you'll get swirls of coconut butter to enjoy the next day! Add the oats and blueberries and stir or shake a few more times. Make sure all of the oats are saturated in the wet mixture. Cover and place in the fridge overnight or for at least 6 hours to set. When ready, simply pull out the oats, give 'em a stir and enjoy! You can add extra fruit or toppings as desired. Enjoy! NOTES: Leftovers last in the fridge up to 2 days, but are best enjoyed within 24 hours. Serves 1, but recipe is easily doubled.
Print Recipe
Strawberry Rhubarb Crumble
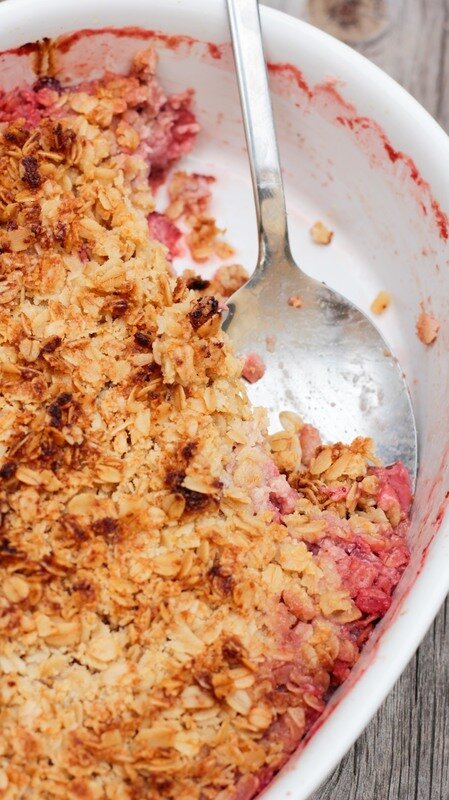
Guys! We're back up and running. ICYMI, the site was down for a couple of day because we're working on a transitioning the blog to a new name. You may've already seen the sneak peek on instagram, but if you haven't, we'll be soon be ditching the name Fettle Vegan and calling the blog Good Saint. More on that in my next post! If you're not already subscribed to our weekly newsletter, now might be a great time - so you don't miss a thing when we switch over! For now, I'm bringing you a sweet, seasonal treat: Strawberry Rhubarb Crumble. This crumble is the BEST. Is it yummy, it is sugar-free, and it is so simple it'll blow your mind. Oh, and did I mention gluten-free? And soy-free? It ticks those boxes too, babes. It's a baked good you can feel good about eating and will feel good about eating because it tastes damn delicious. I did good, guys. And I think you're gonna be really proud of me.
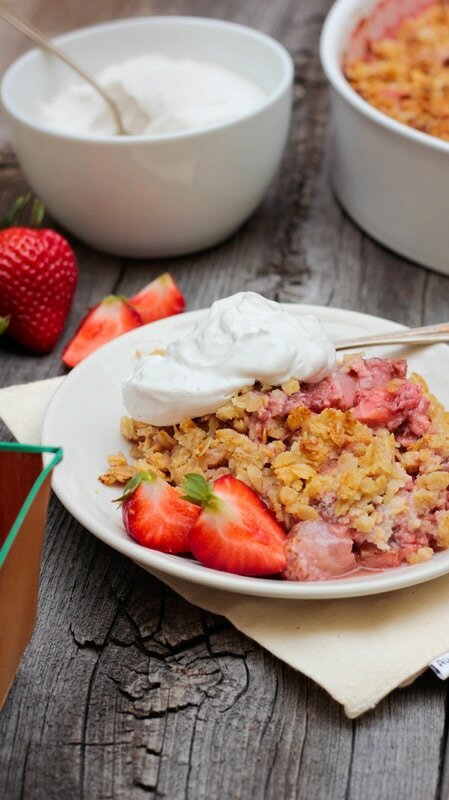
I needed a sweet, simple dessert. I've been BUSY lately! With the site changes and the wedding - posts on THAT coming soon, too! - plus the honeymoon, and now my 200-hour yoga teacher training at CorePower, I've been exhausted lately and playing constant catch-up. I just don't have time for 15-ingredient layer cakes these days! Just 10 ingredient crumbles. 😉 I worked hard to keep the ingredients simple and whole, because I'm all about eating real, wholesome foods these days. Nothing processed, no preservatives, no extra sweeteners. It's summer - you don't need that shit. Whether you pick your own sweet strawberries (I MISS doing that in Maine every year!) or just buy 'em on sale at the grocery store, the secret here is really the rhubarb. It gives such a great tart balance to this easy dish. I highly recommend adding a dollop of coconut whip before serving - it's the perfect topping. Recipe linked below - so let's get cooking!
INGREDIENTS:
Crumble 2 cups fresh rhubarb, sliced 4 heaping cups fresh strawberries, chopped 2 tablespoons lemon juice 1 tablespoon chia seeds 1 cup almond flour 2 cups GF oats 1/4 cup monk fruit sweetener (or sweetener of your choice - sugar works if you're into it, and the ratio is 1:1!) 1 teaspoon baking powder 1/4 teaspoon salt 1/2 cup softened coconut oil Coco Whip 2- 15 oz. cans whole fat coconut milk 1-3 tablespoons non-dairy milk 1-3 tablespoons monk fruit sweetener (again, use your fave sweetener here if you prefer!) 1 teaspoon vanilla DIRECTIONS: Preheat oven to 375 degrees. Grease a 9x13 inch glass baking dish and set it aside. In a large mixing bowl, toss your strawberries and rhubarb in the lemon juiced chia seeds until evenly coated. In a separate mixing bowl combine the almond flour, GF oats, flour, monk fruit sweetener, baking powder and salt. Add in the softened coconut oil and stir until crumbs begin to form. Pour the strawberry rhubarb mixture evenly into the greased glass baking dish. Top with the oat + almond flour crumble mixture, distributing evenly. Put the crumble into the oven and bake for 35-45 minutes, until crumble topping becomes golden and berry mixture bubbles. Remove from oven and let cool completely before serving. Or eat it straight from the pan while you watch the Bachelorette. I'm not here to judge! To prepare the coconut whip, simply scoop the firm solids from the cans of coconut milk into a large mixing bowl and toss in the sweetener, milk, and vanilla and whip with beaters until fluffy. Scoop onto your crumble and enjoy! TIPS: Leftovers - both the crumble and the ship - stay well, wrapped separately, in the fridge for up to a week. To reheat, cover with foil and reheat at 350 degrees for about 20-30 minutes, or until warm in the middle. Strawberry Chia Pudding Parfait
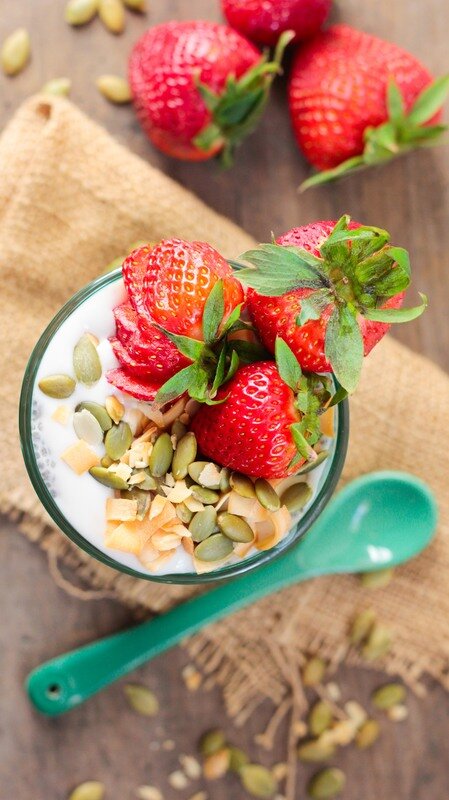
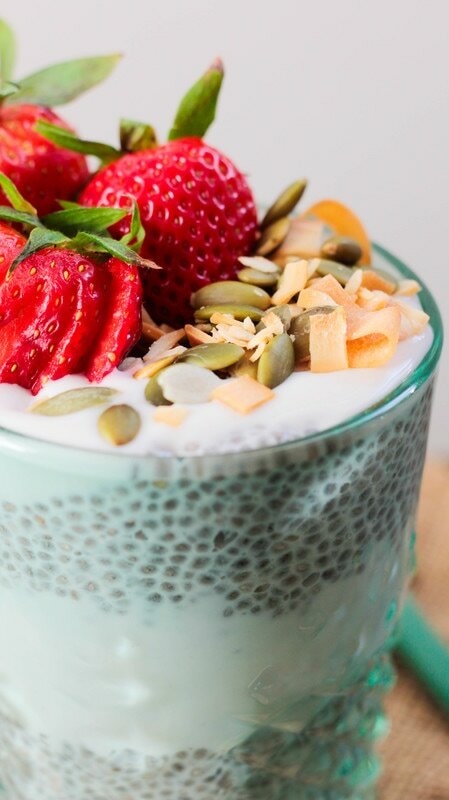
It feels like summer here in LA and we've got just about 80 days left on the wedding countdown, so we're keeping the snacks as light, healthy, and sugar-free as possible! This easy chia parfait has been my go-to snack lately. It's light enough to make a great breakfast or guilt-free dessert, but hearty enough to kill your sweet cravings and make a great post-workout meal. The chia seeds are packed with fiber, protein and Omega-3 fatty acids and are considered a superfood - so we could all use more of them in our diets! Plus, they make an excellent stand in for thick, creamy pudding. We are totally crushing on Forager's new unsweetened, cashew-based yogurt right now and used it to make our parfait. You can use whatever yogurt you like, but try to choose one without added sugar or preservatives. The real-er, the better. Especially when you're snacking! Strawberries are already in season here in California, but you can sub in whatever fruit makes you swoon. Toppings are customizable too, so you do you babes. The real point here is make a healthy, hearty, on-the-go snack that you can feel good about eating. And this one you for sure can!
Looking for other strawberry recipes this season? Try our Strawberry Lemon Crisp, Strawberry Cheesecake Smoothie, Strawberry Rhubarb and Rosemary Galette, and Peanut Butter and Berry Acai Bowl!
INGREDIENTS
Vanilla Chia Pudding 1/3 cup chia seeds 1 1/2 cups unsweetened almond milk 1-3 drops of liquid stevia (or sweetener of your choice) 1/2 teaspoon vanilla Chia Pudding Parfait 1/2 cup vanilla chia pudding 1/2 cup unsweetened non-dairy yogurt 1/4 cup fresh strawberries, sliced coconut chips, garnish pepitas, garnish DIRECTIONS In a large bowl whisk together the chia seeds, almond milk, stevia (or sweetener) and vanilla. Let sit about 30 minutes, stirring occasionally, until the mixture is thick - the texture of pudding. Set aside. Chop your strawberries and prep your toppings. If you don't have (or like) coconut chips and pepitas, you can sub in nuts, granola, other fruits - whatever you've got on hand! To make the parfait, layer alternating 1/4 cups of chia pudding and yogurt into a cup or dish, and top with your favorite toppings and sliced strawberries. Easy peasy! NOTES Leftovers last in the fridge about 3 days in an airtight container. This recipe serves 1, but can be easily doubled or quadrupled for sharing! PB + J Energy Bites
These PB + J Energy Balls are the bee's knees my friends! I made them by accident the other day while trying to make a healthy, satisfying, sweetish treat while cleaning out my cabinets. I didn't want to get the blender or food processor involved because they're a pain to clean, so these little cuties are stuck together using my favorite sticky ingredient: peanut butter! And because they're packed with PB, chia and flax they're packed with protein and healthy omega-3 fatty acids, too. Which makes these perfect for bringing along on a hike, picnic at the beach, or on your next road trip. Because we used freeze-dried strawberries here instead of fresh strawberries they last longer out of the fridge and are a little less messy that they would be normally. I passed some along to my sports trainer friend who LOVED them and said he'd love them as an after workout boost. Best of all? They're a 1-bowl recipe and take just minutes to make, so you'll be snacking in no time. So let's eat!
INGREDIENTS
1 cup oats 2/3 cup freeze dried strawberries, roughly chopped 1/3 cup ground flax seed 1/3 cup chia seeds 1/2 cup peanut butter 1/3 cup maple syrup or agave nectar 1 teaspoon vanilla extract DIRECTIONS In a medium bowl combine the oats, strawberries, flax and chia. Add in the peanut butter, maple syrup and vanilla extract and stir until thoroughly mixed. Use a spoon or cookie scoop to roll the mixture into 1" balls. Store in an airtight container and keep refrigerated for up to 1 week. Enjoy! NOTES Makes 16-20 1" balls.
Print Recipe
Stone Fruit Crumble Squares
Summer is here and so are the stone fruits! We've been seeing gorgeous plums, peaches, nectarines and apricots (and all their sub-varieties) popping up at grocery stores and farmers markets and we couldn't resist making something sweet to showcase just how yummy they are. I love eating them raw or mixed into my oatmeal and smoothies, but baked into these low-sugar crumble bars is a great way to mix it up! Plus, they're shareable and perfect party food- easy to eat and packed with a little extra chia seed goodness. We served ours with a sprig of fresh mint, but a dollop of soy or coconut whip would be perfect here too. The colors of the mixed stone fruit oozing out the sides is gorgeous and drool-worthy. This is a great desert for impressing your friends - and since it whips up fast, it'll look like you work a lot harder on this one than you actually had to. And that is always a good thing. More time for summer cocktail sipping! Go grab a bag of the juiciest, plumpest summer stone fruits you can find and let's eat!
INGREDIENTS:
2 cups (GF certified) oats 2 cups gluten-free flour (whole wheat works here, too!) 3 tablespoons organic sugar 2 tablespoons chia seeds 1/2 teaspoon salt pinch of xantham gum, optional (for use with GF flours) 2/3 cup coconut oil, softened 4 cups stone fruit, pitted + chopped (we used plums, peaches + nectarines) 2 tablespoons lemon juice 1 tablespoon corn starch DIRECTIONS: Preheat oven to 375 degrees. In a large mixing bowl combine oats, flour, sugar, chia seeds & salt. Add in softened coconut oil and stir until crumbs begin to form. Set aside. In a separate mixing bowl, toss your cut stone fruit in the lemon juice and corn starch until evenly coated. Grease an 8x8 (or 9x13, for slightly thinner bars) glass baking dish, then pour a a little over 1/2 of the oat crumble mixture into the bottom of the dish. Press gently into the sides. Top with the stone fruit mixture, spreading evenly. Finally, pour the rest of the crumble mixture on top, distributing that evenly as well. Put crumble into the oven and bake for 35-45 minutes, until the crumble topping becomes golden and fruit mixture bubbles. Remove from oven and let cool completely before cutting into squares. To help squares stay firm, refrigerate until ready to cut. If you like it warm and fresh out of the oven, say to heck with the squares and have a pile of crumble goodness. We're not here to judge. Makes 9-12 squares depending on size, saves well in the fridge for up to a week. Enjoy!
print recipe
Fig + Almond Chia Oat Pudding
I love a good chia pudding. When I first went vegan the idea sort of repulsed me, but after 6 years chia seeds and the strangely gelatinous pudding they can create has become a favorite. I don't make it as often as I should, but when I do I tend to get a little binge-y on it. Its so good! And chia seeds are so good for you and packed with omegas- there's no guilt in this pudding. Plus its vegan, gluten-free, AND raw! This time around, we added oats to both thicken it up and add a little texture and fiber to the pudding. Since figs have just made their spring arrival in grocery stores around here we decided to incorporate some of those, too. The sweet, earthy flavor of ripe figs just contrasts so nicely with the flavor of almond and the crunch of fresh almonds sprinkled on top. And this sweet little recipe whips up in just 5 minutes! Make it the night before and enjoy it as an on-the-go breakfast or take the time to make a small batch for a hike. Its the perfect workout fuel...or late-night snack. Let's eat!
INGREDIENTS:
3 tablespoons chia seeds 3 tablespoons rolled oats 1 cup non-dairy milk 1 teaspoon maple syrup or agave (optional) 1/2 teaspoon almond extract 1/2 teaspoon vanilla extract 4-6 figs, roughly chopped sliced almonds, for garnish DIRECTIONS: In a medium sized bowl mix chia seeds, rolled oats, milk, sweetener, and extracts. Set aside to coagulate for 15-20 mins. Top with figs and sliced almonds and enjoy! Leftovers last in the fridge up to a week.
print recipe
Southern Fried Zucchini Fritters
Zucchini season is in full swing, and we've been eating it up any way we can. I'm a sucker for tender, buttery zucchini dishes and anytime its been roasted. I eat it chopped, cubed, sliced, and diced. But I rarely eat it grated. It was Alex's idea, really. He wanted potatoes AGAIN for breakfast, and I didn't think I could do it. But then he had a brilliant idea- COMBINE 'EM! And deep fry 'em! I was sold. We grated up our favorite veggies and added some homemade chia egg and flour to thicken it up, then threw in some spices to kick up the heat and flavor. Topped with a squeeze of lemon and some fresh cilantro, this desperate breakfast turned into a weekday favorite at our place. Healthiest recipe? Nope. Most delicious? Quite possibly. Let's eat!
INGREDIENTS:
2 cups potatoes, peeled and grated 2 cups zucchini, grated 1/2 cup onion, grated 1/2 cup water + 3 tablespoons chia seeds, blended 2 cloves garlic, minced 1/4 cup gluten-free flour 1/2 teaspoon baking powder 1/2 teaspoon cayenne 1/2 teaspoon smoked paprika 1/2 teaspoon salt 1/4 teaspoon black pepper 1/2 cup coconut oil (for frying) lemon/ lime wedges, cilantro, and hot sauce for garnish & serving DIRECTIONS: Grate peeled potatoes, zucchini, and onion into a large colander. Let drain over a sink for about 5 minutes, using a paper towel to gently squeeze out ay excess water. While draining, heat 1/2 cup coconut oil in a large cast iron pan (or frying pan) on medium heat. (Oil that isn't hot enough won't cook the fritter well and too hot will burn it. Aim for between 325- 400 degrees, if you have a thermometer. Also, use coconut or another HIGH HEAT oil is substituting. Anything less will smoke & burn!) Once veggies seem to stop draining, transfer them to a large mixing bowl. Add blended chia seed mixture & garlic, and stir to combine. Next add in the flour, baking powder, cayenne, smoked paprika, salt & pepper, and stir to combine again. Scoop 1/4 cup amounts of mixture into the heated oil and press gently with the back of a spoon to slightly flatten. Let cook for for a couple of minutes, until golden brown, before flipping. Once fritter is crispy and golden, use a spatula to move it to a paper-towel lined plate, where it can absorb the excess oil. Serve immediately with a squeeze of lemon (or lime!), come chopped cilantro, and a squeeze of sriracha. Mmmm. Freeze leftovers or refrigerate for up to a week. Makes 10-12 fritters. Enjoy! Lemon Chia Seed Loaf with Lemon Glaze
Happy Belated Mother's Day to all you FABULOUS moms for all that you do! But especially my mom, 'cause she's the very best. In fact, if we'd able to spend it together, this is what I would've given her; It's moist, sweet, full of flavor, and a perfect Spring treat. Perfect for breakfast, dessert, or for a graduation party pr baby shower. Keeping it gluten-free means sharing with EVERYONE at the party, which makes you an in instant success. Yep, this recipe = success. Making you a winner. Go you! Anyway, I really love how the fresh lemon compliments the crunchy chia seeds, and using almond flour adds a bit of a rich, nutty taste. It's really great, and I think you're gonna love it. Not a loaf kinda gal? Bake 'em up as muffins! Watching your sugar intake? Cut out 2/3 of the sugar by ditching the glaze. Now, let's eat!
Ingredients:
For Lemon Chia Seed Loaf 2 1/4 cups gluten-free flour (we used 1 1/4 cup almond flour + 1 cup teff flour) 2 teaspoons baking soda 1 teapsoon baking powder 1 1/2 teaspoon xantham gum 1 teaspoon salt 1/2 cup coconut oil, melted 1 cup dairy-free milk 1/4 cup organic sugar 1 teaspoon vanilla extract 1 heaping tablespoon freshly grated lemon zest 1/3 cup freshly squeezed lemon juice 2 tablespoons chia seeds For Lemon Glaze 1/2 cup powdered sugar 1-2 teaspoons lemon juice *Glaze is optional, but glaze is delicious. *Whole wheat flour SHOULD be interchangeable here, though I haven't tried it. If you do use WW, omit the xantham. *Sub poppy seeds if you like! *This recipe can be used to make 12 muffins instead of a loaf, if you prefer. They will take less time to cook however, so keep an eye on 'em. Instructions: Preheat oven to 350 degrees. In a large mixing bowl combine flour, baking soda, baking powder, & xantham gum. In a separate mixing bowl whisk together the coconut oil, milk, sugar, vanilla, lemon zest and lemon juice. Pour wet into dry, stirring to combine. Once well mixed, pour in chia seeds and stir again to distribute them evenly through the batter. Pour batter into a greased or lined loaf pan (or into a 12-muffin tin) and toss it in the oven. Bake for 50-60 minutes, until an inserted toothpick comes clean. When finished, remove from oven and move to a cooling rack. Let cool completely before removing from the loaf pan. While loaf cools, make glaze by simply mixing the powdered sugar & lemon juice together until a thick, runny glaze is achieved. Add as much or little liquid as you like, but the more liquid, the thinner the glaze. I recommend starting slow. When loaf cools drizzle with glaze and garnish with a sprinkle of chia seeds and some lemon zest. Lasts 3 days covered on the counter, 5ish sealed in the fridge. Enjoy! |
tagsAll  RSS Feed RSS Feed
|

