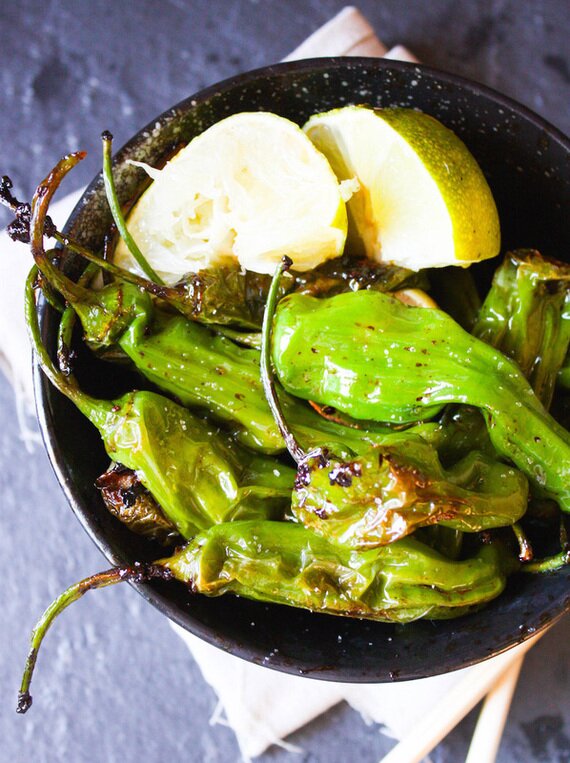
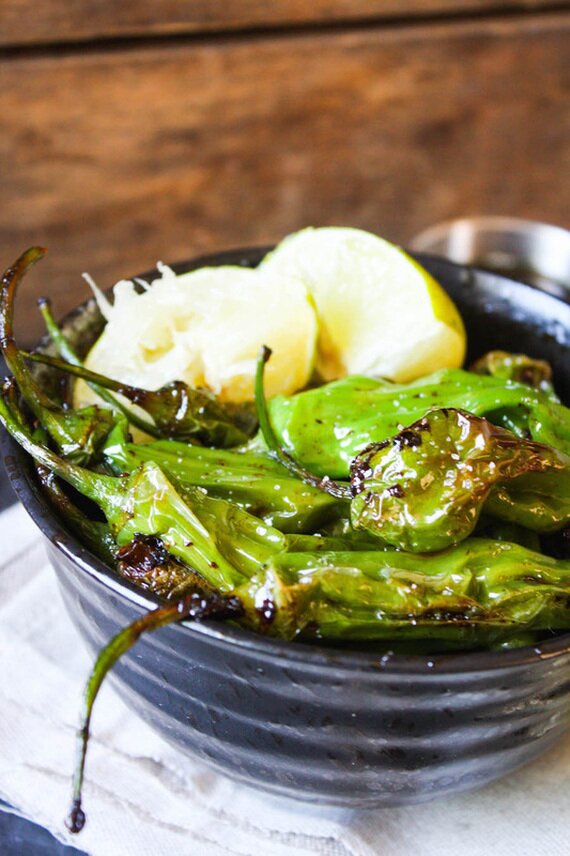
Sesame Ginger Blistered Shoshito Peppers
INGREDIENTS
6 ounces Shoshito Peppers, washed 1 tablespoon coconut oil 1 tablespoon soy sauce or tamari 1 tablespoon toasted sesame oil 1 tablespoon fresh lime juice 1 teaspoon maple syrup 1 teaspoon fresh ginger, minced 1 clove garlic, minced 1/4 teaspoon of chili oil (optional) pinch of salt DIRECTIONS Wash the peppers and heat the coconut oil in a large skillet over medium-high heat. While the oil heats, combine soy sauce, sesame oil, lime juice, maple syrup, ginger and garlic in a small bowl. Toss the peppers into the skillet, then pour in the sauce. Sauté for 5-8 minutes, stirring frequently to coat the peppers in sauce. Continue stirring until peppers become evenly blistered (lightly browned and covered in small air pockets). Remove from heat, and serve immediately with a squeeze of fresh lime and soy sauce or spicy Chinese mustard. Enjoy!
This was a super quick + easy lunch I was inspired to make after first trying shoshitos at sushi place in Seal Beach a while back. They were salty, a bit crunchy, and had just a touch of spiciness. So good! I wanted to do a little spin of my own and included fresh ginger and garlic- 'cause they're my favorite. The sesame ginger sauce was AMAZING and a perfect pair with these sweet peppers! My only addition would be sprinkle of sesame seeds for texture. (I was in a bit of a time crunch, so excuse the not-as-fancy iPhone photos on this one.) They're great as a snack or alongside a dinner with rice and kung pao cauliflower. We found our shoshito peppers at Trader Joe's, but you should be able to find them at any nicer grocery stores or Asian markets. You're gonna love 'em- especially since they're just about 10 minutes, start to finish. Let's eat!
print recipe
0 Comments
Southern Fried Zucchini Fritters
Zucchini season is in full swing, and we've been eating it up any way we can. I'm a sucker for tender, buttery zucchini dishes and anytime its been roasted. I eat it chopped, cubed, sliced, and diced. But I rarely eat it grated. It was Alex's idea, really. He wanted potatoes AGAIN for breakfast, and I didn't think I could do it. But then he had a brilliant idea- COMBINE 'EM! And deep fry 'em! I was sold. We grated up our favorite veggies and added some homemade chia egg and flour to thicken it up, then threw in some spices to kick up the heat and flavor. Topped with a squeeze of lemon and some fresh cilantro, this desperate breakfast turned into a weekday favorite at our place. Healthiest recipe? Nope. Most delicious? Quite possibly. Let's eat!
INGREDIENTS:
2 cups potatoes, peeled and grated 2 cups zucchini, grated 1/2 cup onion, grated 1/2 cup water + 3 tablespoons chia seeds, blended 2 cloves garlic, minced 1/4 cup gluten-free flour 1/2 teaspoon baking powder 1/2 teaspoon cayenne 1/2 teaspoon smoked paprika 1/2 teaspoon salt 1/4 teaspoon black pepper 1/2 cup coconut oil (for frying) lemon/ lime wedges, cilantro, and hot sauce for garnish & serving DIRECTIONS: Grate peeled potatoes, zucchini, and onion into a large colander. Let drain over a sink for about 5 minutes, using a paper towel to gently squeeze out ay excess water. While draining, heat 1/2 cup coconut oil in a large cast iron pan (or frying pan) on medium heat. (Oil that isn't hot enough won't cook the fritter well and too hot will burn it. Aim for between 325- 400 degrees, if you have a thermometer. Also, use coconut or another HIGH HEAT oil is substituting. Anything less will smoke & burn!) Once veggies seem to stop draining, transfer them to a large mixing bowl. Add blended chia seed mixture & garlic, and stir to combine. Next add in the flour, baking powder, cayenne, smoked paprika, salt & pepper, and stir to combine again. Scoop 1/4 cup amounts of mixture into the heated oil and press gently with the back of a spoon to slightly flatten. Let cook for for a couple of minutes, until golden brown, before flipping. Once fritter is crispy and golden, use a spatula to move it to a paper-towel lined plate, where it can absorb the excess oil. Serve immediately with a squeeze of lemon (or lime!), come chopped cilantro, and a squeeze of sriracha. Mmmm. Freeze leftovers or refrigerate for up to a week. Makes 10-12 fritters. Enjoy! Crispy Chickpea Onion Rings
So like almost everyone, I have a soft spot for fried food. I know it's bad, but sometimes it is so, so good! And often- and can I get a HELL YEAH on this one- finding guaranteed gluten-free fried food at restaurants is DAMN NEAR impossible. So here's to saving money and eating as many portions as you want without being judged- our Crispy Chickpea Onion rings recipe. This is a favorite at our place when we need some junk food because they're gluten-free, have plenty of batter (there's nothing I hate more than a barely coated onion ring!), and are deeeeelicious. The batter is slightly sweet and nutty with a hint of smoky flavor, which tastes great with a little sriracha mayo or even old school catsup, and even better with a beer. They're a great app for sharing at parties and Sunday sports games, but equally great all by yourself with a chick flick. No judgement here! I think you're gonna love 'em, so let's eat.
Ingredients:
3-6 cups vegetable or coconut oil for frying (or as needed) 1 cup chickpea (garbanzo bean) flour 1 1/4 teaspoon garlic salt 1/2 teaspoon smoked paprika 1/4 teaspoon ground pepper 3/4 cup water 1 very large red onion Directions: In a large deep pot or dutch oven, pour in enough oil to completely submerge the onion rings, about 2-4 inches. Heat oil over medium/high heat to 365º OR test oils readiness by dropping an onion ring and seeing how it looks. If it immediately bubbles and begins to fry and turn golden brown, you're good! If not, wait a few minutes and try again. If it burns, turn down the heat and wait for it to cool before trying again. In a large mixing bowl whisk together chickpea flour, garlic salt, paprika, pepper and water. Set aside to thicken. (Should be about as thick as pancake batter.) Using a fork or tongs, dredge onion slices until evenly coated in the batter. Let excess batter drip off, but leave enough so that the onion ring is well coated. Drop it into the heated oil and let fry about 1-2 minutes on each side, until golden brown and crispy. Remove cooked rings from oil and let cool on a paper-towel lined plate to absorb excess oil. Continue to cook the rings until finished, adding oil to the pan as needed to keep the depth. Be sure to bring the oil back up to temperature after adding extra and before adding new rings. Once rings have cooled, serve immediately with a sprinkle of parsely & ketchup, sriracha, or cilantro lime mayo!
print recipe
Crispy Cauliflower Nuggets
Exciting news! (I mean, beside the fact that you're about to make your own deliciously crunchy cauliflower nuggets.) I got the job I've been so hoping to hear back from at the non-profit, and I'm so excited about it! So excited, in fact, that I demanded we celebrate by making nuggets and fries for dinner. Alex happily obliged. Now the nuggets might be gone but the excitement is STILL HERE! I feel like this move is to a position that is much more closely aligned with the work I'd like to spend the rest of my life doing, and again, I'm PUMPED! So, go me. Enough of that though...how 'bout those nuggets?
Crispy, perfectly golden, fried cauliflower nuggets will change the future of nuggets as we know it. Alex claimed they were better than any chicken nugget he had ever had (duh!), and loved the slight crunch and the fact that he didn't feel like crap after eating them. I love all things fried (in moderation, of course), and was happy to have something to slather in ketchup- my guilty pleasure. Now I know frying is bad and we shouldn't do it, but if we're gonna splurge here, at least you're frying up a vegetable, right? And 2014 has been named the Year of the Cauliflower- so let's do this thing!
INGREDIENTS
2 cups cauliflower florets (about 1/2 head of cauliflower) 1/4 cup high heat oil, for frying (coconut, grapeseed, and avocado oils are all great high-heat options) Flax Wash: 1/4 cup ground flax 1/4 cup almond meal 3/4 cup water Flour Mix: 1 1/2 cups bread crumbs (gluten-free or regular) 1/4 cup almond meal 1 teaspoon organic sugar 2 tablespoons nutritional yeast 1/2 teaspoon garlic salt 1/2 teaspoon sea salt 1/4 teaspoon cracked black pepper 1/4 teaspoon cayenne pepper DIRECTIONS In a small bowl, make flax wash by mixing ground flax, almond meal, and water. Set aside. Next, mix together in a medium-sized mixing bowl the bread crumbs, almond meal, sugar, nutritional yeast, garlic salt, salt, pepper, and cayenne. This mixture will become your breading. Heat 1/4 cup oil n a large frying pan over medium heat. Dip cauliflower florets into the flax wash mixture, coating lightly but evenly. Next, dip cauliflower into the flour mixture and coat completely. Drop coated cauliflower nuggets into the heated oil, and cook until golden and crunchy, then flip and repeat until the nugget is evenly fried, about 2-3 minutes on each side. Using tongs or a spatula, move cooked nuggets to a paper towel lined plate to absorb excess oil, let cool several minutes, then enjoy with your favorite dipping sauce! Best if eaten immediately. Uneaten nuggets can be reheated in the oven at 375 degrees for 10 minutes, or until warm. Enjoy! **Not much for fried foods? You can try baking these at 400 degrees for about 20-30 minutes, flipping halfway through. They won't be nearly as crunchy and crispy, but probably much healthier. Do what you gotta do!
print recipe
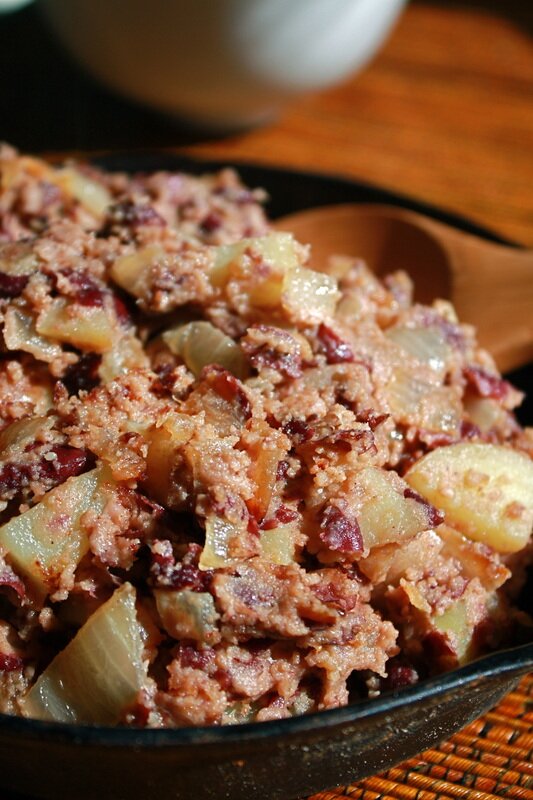
Corned Bean Hash
My mom was always firm in asserting her Irish heritage, especially on Sundays. Sundays seemed to always be the day we celebrated things with family, be it holidays or just the one day of the week we all sat down for a meal together. Either way, most of my favorite Sunday meal memories involve my mom serving up a dish of corned beef. A seriously fatty, salty cut of beef, it pairs perfectly with cabbage, butter, pearl onions, and peppercorns. As leftovers, nothing makes a better next-day breakfast: corned beef mashed with potatoes, onions, garlic, salt, and a little bit of cabbage...the original 'Corned Beef Hash' breakfast I grew up lovin'.
Obviously, my options are much more limited now when trying to recreate her dishes. Tempeh doesn't do the trick, and seitan simply doesn't have it. The trick here? Good old fashioned legumes. Kidney beans, to be exact. While no exact mimic in texture, the flavors brought together in this dish bring me all the way back to that giant wooden dining table of my youth.
Ingredients:
2 tablespoons sunflower oil (or other high heat oil) 1 cup onion, diced 1 cup cooked kidney beans, mostly mashed 1 cup potatoes, diced into 1/2 in. chunks 1/4 cup tahini 1-2 tablespoons Braggs liquid aminos or soy sauce 1/4 teaspoon black pepper 1/4 teaspoon garlic powder 1 tablespoon water
Instructions:
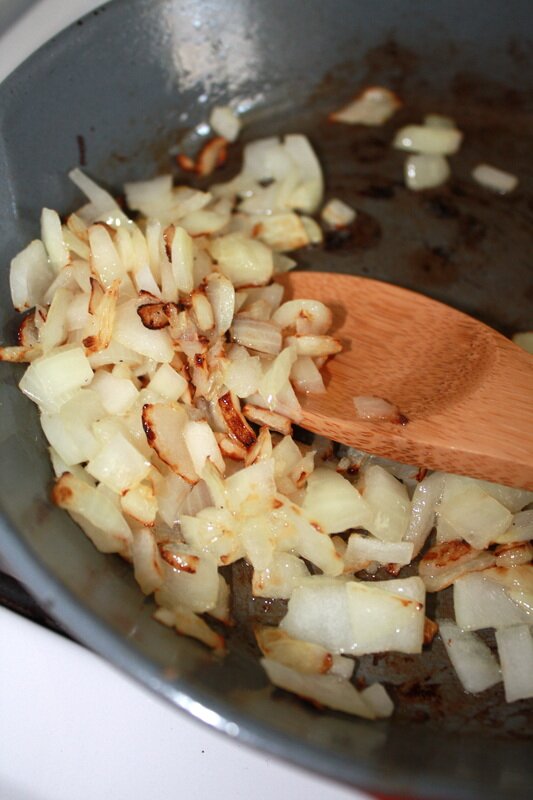
Heat oil in a cast iron skillet on medium/ high heat. Add chopped onions and cook until they soften and brown slightly. Separately, mash your kidney beans. They should still be a little chunky, just mashed enough to bind things together. When the onions are ready, throw in the kidney beans, potato, tahini, liquid aminos, and water. [*Remember: liquid aminos/soy sauce are SALTY. Start with 1 T. and add more as needed!] Stir to combine. Cover and cook on medium heat for about 15-20 minutes, until potatoes soften, stirring occasionally to prevent sticking. If anything does stick, add a little water to the pan (about 1 tsp as a time) to help loosen things up. Once its ready, remove the cover and cook several more minutes on each side, letting both sides get a little browned and crispy. Serve straight from the skillet- its best piping hot! Serve with tofu scramble, toast, or perfect vegan pancakes!
My favorite part about this recipe is the lack of guilt I feel after consuming it. No lard, no unhealthy fats, and nothing processed. A great way to kick off healthy breakfasts in the New Year!
And I think Mom just might be proud. Beer Battered Onion Rings
The other day we made Baked Black Bean Burgers to share with you guys, but you should know-we didn't eat those burgers alone; they each came with a hefty side portion of these awesome, crispy onion rings.
We filled the onion ring batter with an orange wheat beer that truly compliments the thick, crunchy rings and makes for an onion ring so good, its more suited to being an onion-ring-donut! We don't normally make or eat many fried foods, but sometimes, you just have a craving that needs to be caved to. And frankly, these were worth every extra bit of oil and calories involved. I know we shouldn't make a treat like this weekly, but damn its tempting.
Ingredients:
1 large onion 1 cups whole wheat flour 1/2 cup cornstarch 2 teaspoons nutritional yeast 2 teaspoons salt 2 teaspoons pepper 2 teaspoons baking powder 1 tblsp onion powder 2 tsp garlic powder 1 bottle (vegan!) orange wheat beer 1 cup peanut oil, for frying
Directions:
First, chop your onion into large rings by slicing the onion width-wise about every 1/4-1/2 inch. Set aside. Grab a mixing bowl and whisk together flour, cornstarch, nutritional yeast, salt & pepper, baking powder, onion powder, and garlic powder. Add the orange wheat beer and whisk again to combine all ingredients. Once mixture is prepared, pour the one cup of peanut oil into a deep, heavy skillet and let heat to between 350-375 degrees. Test using a thermometer. Place individual slices of onion into the batter, coating thoroughly. Once coated, drop into the heated oil using tongs. Let fry on each side for about 3-5 minutes, flipping midway. Be sure when you're adding rings to the oil to not overcrowd the rings. Usually about 3-5 rings can fit to fry at a time. Rings are finished when they reach a uniform golden-brown color and crunch. Remove the rings from the oil using tongs, and immediately place onto paper-towel lined plates. This allows the rings to cool while the paper towels soak up any extra oil. Wait until cooled, then enjoy with ketchup, mustard, bbq sauce, or just by themselves! (We ate ours pretty quickly, and I wouldn't recommend saving any extras. Fried foods get kind of yucky when left over night in the fridge! However, the batter would be fine by itself in the fridge for several days.)
PRINT RECIPE
|
tagsAll  RSS Feed RSS Feed
|
