Fresh Cherry Scones
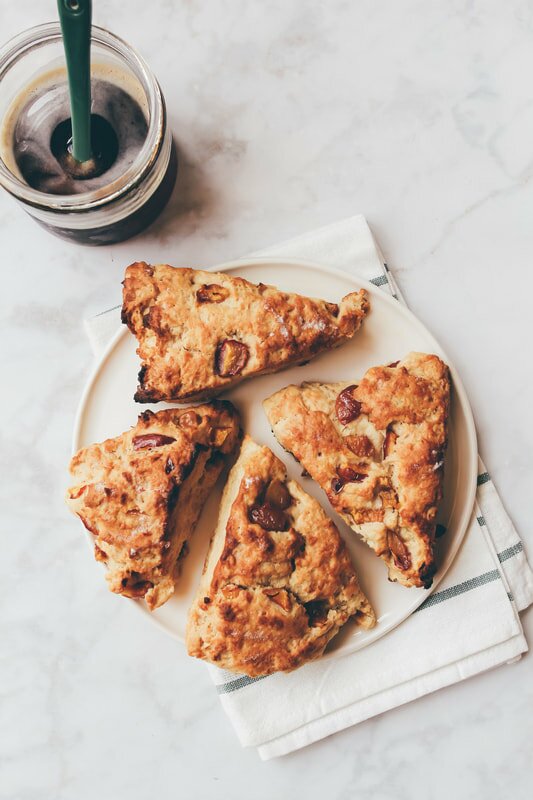
Guys, I love breakfast. It is my FAVORITE meal of the day. I love it sweet, savory, salty, sticky, soupy - any which way, I'm here for it! I'm also a HUGE fan of fresh cherries. As soon as they're in season I make my way to my farmer's markets and buy them up by the slightly overpriced pound. It's my favorite time of the year! So I combined my favorite meal with my favorite season and got these sweet, delicate, delicious beauties!
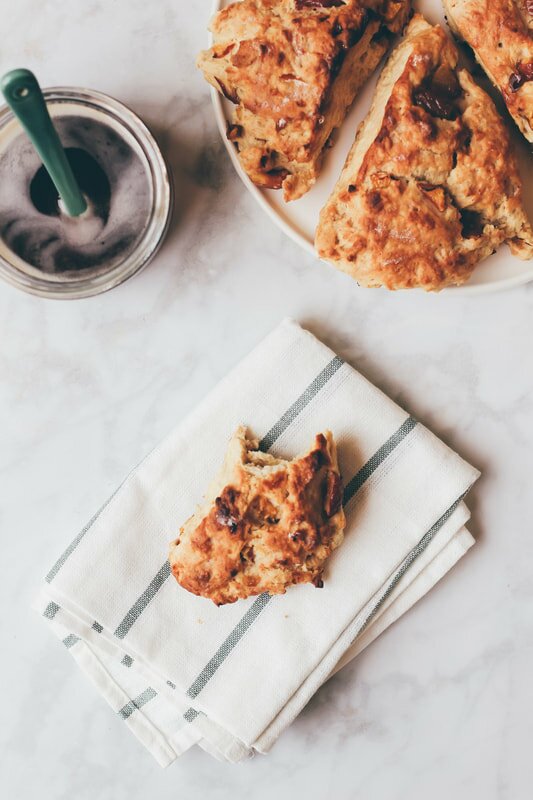
They're light and sweet but full of flavor and just the right amount of 'scone dry' - perfect alongside a glass of milk or a cup of tea. I kept them lower sugar and you can keep them even lower in sugar by skipping the maple drizzle altogether - your choice! Best of all, this scone recipe is super versatile so you can mix it up by adding in different fruits or flours and will always have success. I love it! I've thrown in raspberries, blueberries, even peaches, and they always come out totally brunch- and instagram- worthy.
If you love a good scone (and who doesn't?) then this recipe is for you. Just the right amount of moist and 'scone' dry, they whip up super easily and are easily made when you're ready to eat them but also last well overnight so you can bake ahead and sleep in before brunch, no stress. What're we doing still chatting? You've got some baking to do, babes!
INGREDIENTS
Cherry Scones 2 cups AP or whole wheat pastry flour 1 tablespoon baking powder 1/2 teaspoon ginger 1/2 teaspoon salt 6 tablespoons cold (vegan) butter 3/4 cup mashed banana or 2 eggs 1/4 cup almond milk 2 tablespoons maple syrup 1 teaspoon vanilla 1 heaping cup pitted and chopped fresh cherries Glaze 1/4 cup maple syrup (OPTIONAL - or check out our other scones glaze recipes below) DIRECTIONS Preheat the oven to 425ºF. Line a baking sheet with parchment paper. To make the scones, in a large mixing bowl, whisk together the flour, baking powder, ginger and salt. Using a pastry cutter or fork, cut in the cold vegan butter until small crumbs form. Pour in the mashed banana (or eggs), almond milk, maple syrup and vanilla and stir together with wooden spoon until a sticky dough forms. Fold in the fruit gently. Turn the dough onto a lightly floured surface and form a 1-inch thick disk. Cut the disk into 8 equal scone wedges, like a pizza. Place the scones on the prepared baking sheet and bake for 14-16 minutes, until golden. Place the scones on a wire rack to cool. While they cool, prepare the maple glaze by beating the maple syrup until it begins to aerate and get a little creamy. Drizzle the glaze over completely cooled scones and enjoy! NOTES Makes 8 scones. Leftovers save well sealed in an airtight container on the counter for up to 3 days. Longer than that, save frozen and heat in the toaster oven when ready to enjoy. Check out other scone recipes here: Vanilla Glazed Matcha Scones, Mini Chocolate Chunk Scones.
Print Recipe
6 Comments
CBD CHAMOMILE TEA LATTE
CBD seems to be all the rage these days. Which is kind of funny for me, because as a long-time marijuana user, I've always been a fan of it's healing properties. But now its trendy, and everyone is curious about the benefits! Probably because marijuana is becoming legalized all over the place, taking CBD has become more acceptable in larger communities. I'm all for more people becoming interested - I think the benefits of marijuana have barely been explored and could be super beneficial in healing and providing pain relief from painful and debilitating diseases. That said, I'm not a doctor. You probably knew that, but I feel like before dispensing any of the following advice, it's something we should just say out loud.
That said I think there are a lot of really great reasons to try CBD, and a whole bunch of different ways try it. Today we're infusing creamy, dreamy chamomile tea latte - but before we do, I want to break down some of the benefits of CBD, talk about some of the misconceptions, and breakdown for you exactly why CBD along will not get you high(I promise!), and talk a little vocab:
Now that those terms are cleared up for ya (they're all very similar and get super confusing if you're new to this!) let's talk benefits! CBD has been proven to help with inflammation, sleep, and anxiety and depression. Talk about a triple threat! Users also report lessened nausea, muscle tension, reduced blood sugar levels and reduced prosiasis when using CBD regularly! And I personally LOVE it for helping with period cramps and pain. It's a serious miracle worker. Always check with your doc before trying anything new, but know that CBD alone CANNOT GET YOU HIGH. As you can read above, CBD is literally defined as being non-psychoactive, so no sinking into the couch and craving frosted flakes-stuffed chocolate chip cookies. Most companies that produce CBD oil extract it from hemp, leaves, stalks, and flowers. The extraction method is called CO2. The THC and CBD parts of the plant are separated in most over-the-counter products, and CBD can be legally sold all over the US on its own. You've probably started seeing it pop up all over health food stores and on your instagram, and that's because now that marijuana is becoming legalized in the US, more people are willing to talk about it's healing sister friend: CBD.
For the purpose of today's recipe, we'll be using an unflavored, fully-CBD, coconut oil-based formula, but I'm going to share a list of different CBD products you might try here. Also, you should note that some CBD formulas are sold as full-spectrum, which means they DO contain THC, even in trace amounts. This may or may not affect you, but also may or may not show up on a drug test. So be aware, and read the label. While we're talking about types, let's also touch on DOSAGE. It varies for everyone, and you're going to need to experiment to find your optimal amount, but most people start with a few drops as directed on the bottle into whatever they're eating or drinking, or place it directly under the tongue. I think about 5-20 mg per serving is a nice place to start. You can always up the dosage to see if you need more, but best to start slow. Some people report CBD caused them increased anxiety, but I've never had a negative experience with it. Any maybe you'll find it isn't for you for whatever reason (cost, no real need, just wanted to try it out) and that's okay, too. It is important to remember that as with most trendy things, you've gotta decide if its actually right for you - not just hop on the bandwagon because all the girls at work are trying it.
Touching back on consumption, there are a lot of different ways you can find and buy CBD these days - tinctures, pills, infused foods and beverages, topicals / creams, and even bath bombs. It depends on what you're using it for really, and how quickly you'd like it to start working. Ingesting it is a great way to spread the effects throughout the body quickly, but a topical cream is more appropriate for an injury or sore muscles. For today's recipe, and a great way to start adding CBD to your life in general, is with squeezable CBD drops. They are usually favored, but you can find them unflavored OR often made in a tincture with coconut oil. I'll share some of my favorite brands below, but lately I've been particularly loving the Dr. Raw Organic Coconut Oil CBD Drops. They're totally tasteless and can be used sublingually, topically, or in cooking! You can order them online OR head to your local health food store or dispensary and see what your options are. These are a full-spectrum drop. We'll be using 10 mg (about 1 dropper full of Dr. Raw's brand) in our beverage today.
Brands worth checking out - some are full-spectrum, some are not:
Dr. Raw Organics Focus Formula (my fave) The Daily Hit - CAP Beauty (made with added adaptopgens) Green Mountain CBD Alpine Hemp Essential Daily CBD Those are just a few I'm familiar with. remember to check your local stores, too! ONE MORE NOTE: Technically, CBD can be extracted from either HEMP or MARIJUANA. Where it is extracted from may influence your ability to buy it depending on legalization in your state. HEMP-extracted is legal all over the US, while MARIJUANA-extraced in only legal in states with legalized marijuana laws like California, Colorado and Washington (ect). If you're having trouble getting CBD shipped to you and don't live in a legalized state, be sure it is HEMP-derived so you can receive it directly shipped to your home. Keep scrolling for the recipe!
CBD Chamomile Tea latte (Serves 1-2)
Ingredients: 2 cups (480 ml) unsweetened almond milk 2 chamomile tea bags OR 2 tablespoons (10 g) loose leaf tea in a strainer 2 tablespoons (30 ml) maple syrup 10 mg CBD oil (we used 1 dropper full of Dr. Raw's Focus Formula infused coconut oil) 1/8 teaspoon ground ginger 1/8 teaspoon freshly ground nutmeg chamomile flowers, for garnish Directions: Heat the milk and tea in a medium-sized saucepan until hot, but do not bring to a boil. Remove the tea bags or strainer and whisk in the maple syrup, CBD isolate, ginger and nutmeg. Using a milk frother or high speed blender, add your desired amount of foam to the drink. Garnish with chamomile flowers and serve immediately! Tips: You can use any tea you like in place of the chamomile. Strong green, fruity black and earthy herbal teas all taste great!
PRINT RECIPE
Interested in ingesting your CBD or THC? Check out our '5 Best Vegan Medicated Edibles' and check out our Infused Holiday Gravy recipe! For more info on CBD products and how to use them, head here. Then let us know how your CBD experience was! We want to know your fave brands and how you like to use them in the comments below, babes! Wild Blueberry Overnight Oats
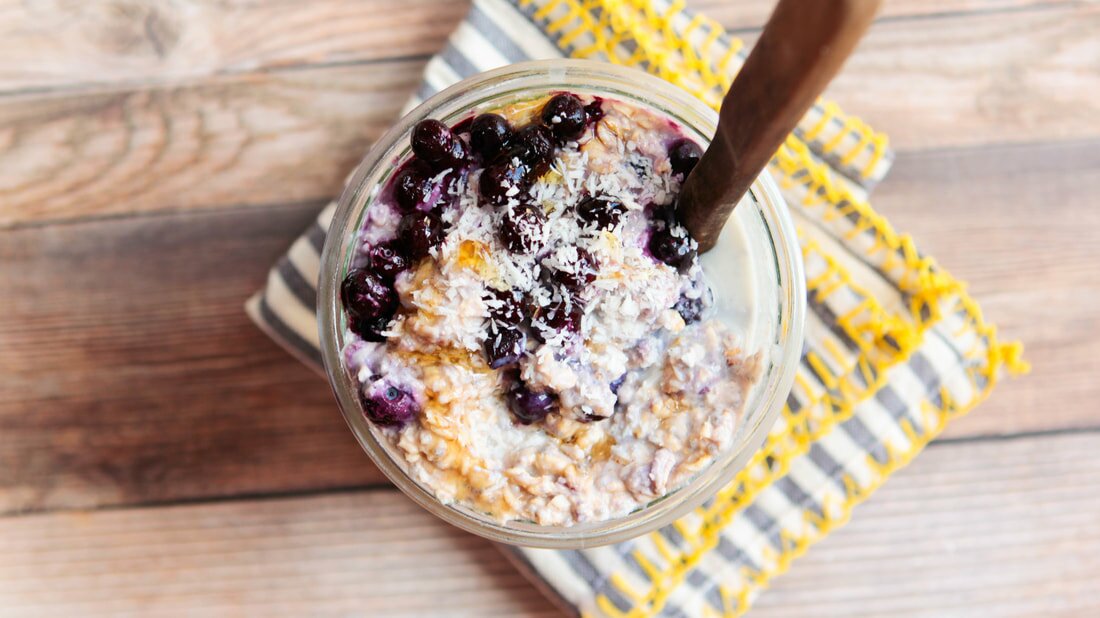
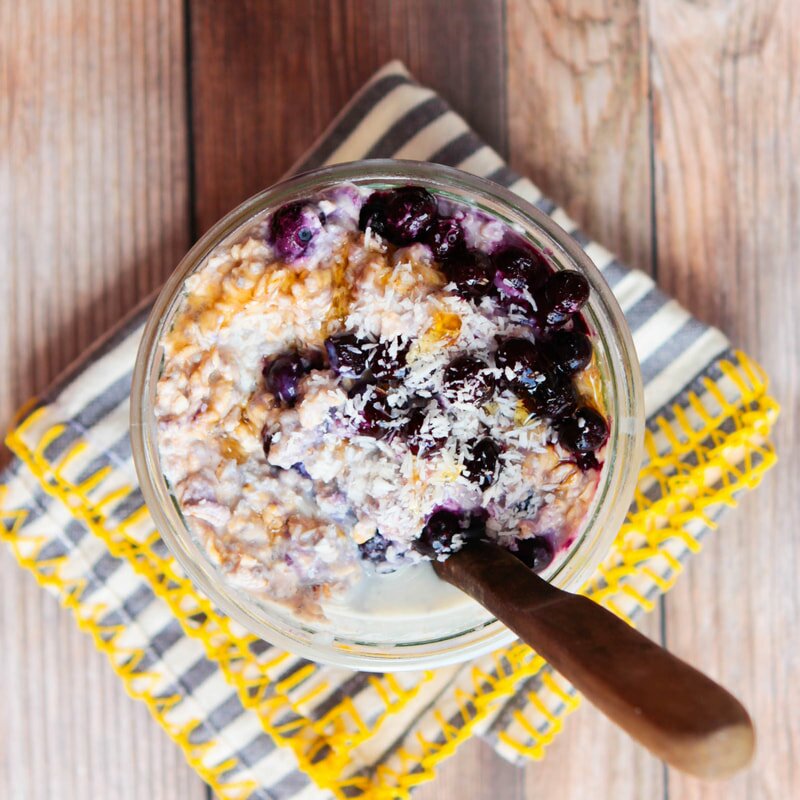
This is a super simple recipe, but sometimes those are the best recipes. I get into food moods all the time, and lately I've been super busy and hooked on easy, on-the-go breakfasts and lunches that pack some real nutrition and can keep me filled up when I have to teach back to back classes with no snack time in between. Being a Maine girl at heart my berries of choice were of the small, tart, and wild variety - but you can sub in whatever fruit or berries you prefer here, instead. The addition of coconut butter adds healthy, hearty, good-for-you fats that'll help keep you moving and the chia seeds add just a little extra texture (and a whole lotta omegas!) to the mix. All you'll need is a few simple ingredients that you probably already have on hand, a glass jar, and a serious appetite. Let's eat!
Before you make your way down to the recipe, a quick reminder that I'm currently teaching 4x a week at CorePower Yoga in Brea, if you're looking to get your sweat on - and soon will have my own yoga vids for you guys to access on my YouTube whenever you need to flow! Send me your flow requests and I'll try to make them happen. Alright - keep scrolling!
INGREDIENTS:
1/2 cup almond milk 2 teaspoons chia seeds 1 tablespoon coconut butter (or nut butter of choice) 1 tablespoons maple syrup 1/2 cup (GF) rolled oats 1/2 - 1 cup wild blueberries (fresh or frozen) DIRECTIONS: In a mason jar or small bowl, combine the almond milk, chia seeds, coconut butter, and maple syrup and stir or shake to combine. The coconut butter doesn't need to be completely mixed with the almond milk - and you'll get swirls of coconut butter to enjoy the next day! Add the oats and blueberries and stir or shake a few more times. Make sure all of the oats are saturated in the wet mixture. Cover and place in the fridge overnight or for at least 6 hours to set. When ready, simply pull out the oats, give 'em a stir and enjoy! You can add extra fruit or toppings as desired. Enjoy! NOTES: Leftovers last in the fridge up to 2 days, but are best enjoyed within 24 hours. Serves 1, but recipe is easily doubled.
Print Recipe
Healthy Matcha Waffles
I was always a pancakes-kind-of-girl growing up. Every Sunday morning my family would pile into the car and drive to our local diner, Brownies, for some really greasy, disgustingly delicious brunch food. Picture the most quintessential diner heart attack food - now you're there! Haha. I would order a stack of flapjacks with butter and syrup and always got an extra side of syrup. I usually also got a side of corned been hash or bacon, and literally could almost finish it all - even at 10 years old. Yikes! These days, my kind of brunch usually involves much more of the color 'green', at least a few vegetables, and usually a mimosa or two. But sometimes, you just want to go back and have those childhood favorites - without the guilt or greasy food hangover!
These days I prefer the snap of a crispy waffle more a pile of soggy pancakes, and lucky for me we just got a new waffle iron for Christmas! It was time to test it out and make some crispy waffles to satisfy my cravings. I didn't just want any old waffles, so I used my sugar-free protein batter base and added a pop of color and antioxidants with the addition of matcha powder! The matcha powder turned them a lovely shade of green, too. Might have to whip these back out in time for St. Patty's day this year!
I can promise you after rounds and rounds of testing - nothing binds together the batter AND gives the cooked waffles a crispy edge like adding in some protein powder. Plus, all of a sudden my waffles carry a protein content of over 20 grams. BONUS! Now they're not only a great breakfast addition, but the perfect post-workout snack, too. The freeze and reheat really well, and I've taken to making a double or triple batch and freezing the leftovers for easy grab-and-go breakfasts. Let's get out the waffle iron and get cooking!
INGREDIENTS
1 cup all-purpose or whole wheat flour (both work well! For GF use 1/2 c almond + 1/2 c Teff flour) 1/4 cup vegan protein powder* 2 tablespoons matcha powder 2 teaspoons baking powder 1/2 teaspoon salt 1 1/3 cups water 2-3 drops vanilla stevia (optional, for a sweeter waffle) 1 tablespoon oil DIRECTIONS In a medium mixing bowl combine the flour, protein powder, baking powder and salt. Create a well in the center of the mixture, and pout into it the water, stevia and oil. Whisk the mixture together until the batter just comes together. Its okay if there are a few lumps! Do not mix until smooth - unless you want flat, chewy waffles. Ick! Let the mixture set for about 5-10 minutes, let scoop the appropriate amount of batter into your waffle iron and let it cook up until the waffle is perfectly fluffy with crispy edges. Keep it going until all your waffles are cooked up. Enjoy! (I like mine with butter and syrup or a bit of peanut butter and fruit!) Leftovers freeze and reheat really well - I highly recommend making a double batch and sticking some in the freezer for easy toaster breakfasts later! NOTES Makes 2-4 waffles, depending on the size of your waffle iron. *I use Sprouts brand Vegan Vanilla Protein Powder. It's pea protein based and has just 1 g of sugar per serving, which is how I am able to keep the sugar in these waffles nearly nonexistent. Use your favorite protein here, but account for textural differences if it is not pea protein. I usually use softened coconut oil here, but you can sub in any flavorless oil you like.
Print Recipe
Strawberry Rhubarb Crumble
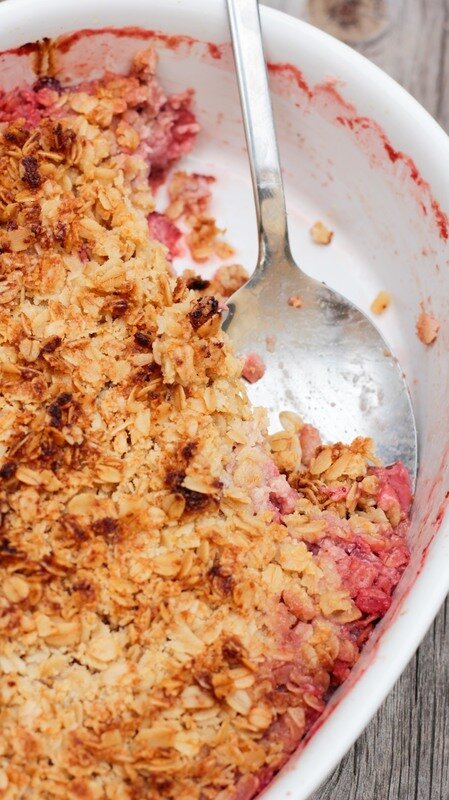
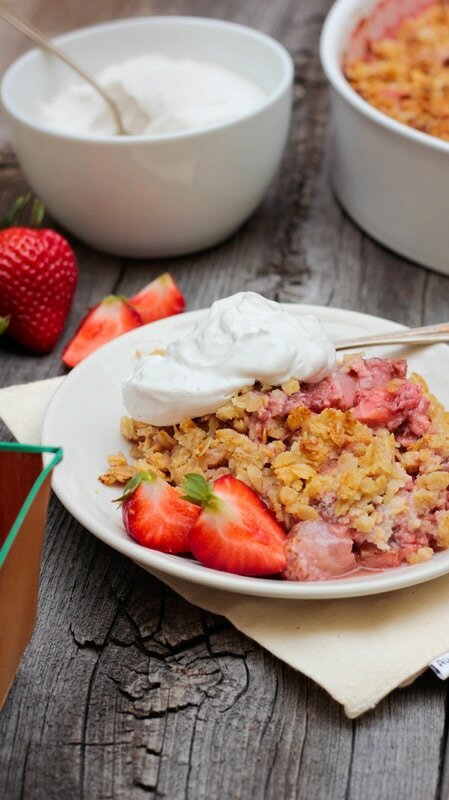
Guys! We're back up and running. ICYMI, the site was down for a couple of day because we're working on a transitioning the blog to a new name. You may've already seen the sneak peek on instagram, but if you haven't, we'll be soon be ditching the name Fettle Vegan and calling the blog Good Saint. More on that in my next post! If you're not already subscribed to our weekly newsletter, now might be a great time - so you don't miss a thing when we switch over! For now, I'm bringing you a sweet, seasonal treat: Strawberry Rhubarb Crumble. This crumble is the BEST. Is it yummy, it is sugar-free, and it is so simple it'll blow your mind. Oh, and did I mention gluten-free? And soy-free? It ticks those boxes too, babes. It's a baked good you can feel good about eating and will feel good about eating because it tastes damn delicious. I did good, guys. And I think you're gonna be really proud of me.
I needed a sweet, simple dessert. I've been BUSY lately! With the site changes and the wedding - posts on THAT coming soon, too! - plus the honeymoon, and now my 200-hour yoga teacher training at CorePower, I've been exhausted lately and playing constant catch-up. I just don't have time for 15-ingredient layer cakes these days! Just 10 ingredient crumbles. 😉 I worked hard to keep the ingredients simple and whole, because I'm all about eating real, wholesome foods these days. Nothing processed, no preservatives, no extra sweeteners. It's summer - you don't need that shit. Whether you pick your own sweet strawberries (I MISS doing that in Maine every year!) or just buy 'em on sale at the grocery store, the secret here is really the rhubarb. It gives such a great tart balance to this easy dish. I highly recommend adding a dollop of coconut whip before serving - it's the perfect topping. Recipe linked below - so let's get cooking!
INGREDIENTS:
Crumble 2 cups fresh rhubarb, sliced 4 heaping cups fresh strawberries, chopped 2 tablespoons lemon juice 1 tablespoon chia seeds 1 cup almond flour 2 cups GF oats 1/4 cup monk fruit sweetener (or sweetener of your choice - sugar works if you're into it, and the ratio is 1:1!) 1 teaspoon baking powder 1/4 teaspoon salt 1/2 cup softened coconut oil Coco Whip 2- 15 oz. cans whole fat coconut milk 1-3 tablespoons non-dairy milk 1-3 tablespoons monk fruit sweetener (again, use your fave sweetener here if you prefer!) 1 teaspoon vanilla DIRECTIONS: Preheat oven to 375 degrees. Grease a 9x13 inch glass baking dish and set it aside. In a large mixing bowl, toss your strawberries and rhubarb in the lemon juiced chia seeds until evenly coated. In a separate mixing bowl combine the almond flour, GF oats, flour, monk fruit sweetener, baking powder and salt. Add in the softened coconut oil and stir until crumbs begin to form. Pour the strawberry rhubarb mixture evenly into the greased glass baking dish. Top with the oat + almond flour crumble mixture, distributing evenly. Put the crumble into the oven and bake for 35-45 minutes, until crumble topping becomes golden and berry mixture bubbles. Remove from oven and let cool completely before serving. Or eat it straight from the pan while you watch the Bachelorette. I'm not here to judge! To prepare the coconut whip, simply scoop the firm solids from the cans of coconut milk into a large mixing bowl and toss in the sweetener, milk, and vanilla and whip with beaters until fluffy. Scoop onto your crumble and enjoy! TIPS: Leftovers - both the crumble and the ship - stay well, wrapped separately, in the fridge for up to a week. To reheat, cover with foil and reheat at 350 degrees for about 20-30 minutes, or until warm in the middle. Nearly Sugar-Free Chocolate Chip Cookies
With my new Homestyle Vegan cookbook hitting shelves November 1st, my first book signing event and the Holidays coming up, I've really been doing my best stay low stress and to avoid sugar. Not only do I have wedding I'm trying to look pretty great for, but sugar is just not my friend. It's the number one food that makes me gain weight and really screws with my face, causing breakouts. I really try not to eat much of it as part of my everyday diet. Besides foods with natural sugar like fresh fruit, of which I indulge plenty, I really don't eat it. Except when I'm menstruating - then all bets are off, friends. Then I will fight you for your french fries. Then I will eat an entire pint of ice cream with no regrets. Then I am unstoppable, and Alex knows it's best to just get out of my way and let me eat through the cramps and lower back pain. But since I can be kind of rage-binge-y at that time of the month, I've started combatting later, meaner, hungrier me with some seriously indulgent-tasting, nearly-sugar-free chocolate chip cookies!
They are soft, chewy, sweet, and taste like they should be packed with sugar - but NOPE! Just a couple of optional tablespoons in this recipe, and it doesn't even have to be refined. I've made these cookies maybe 30 times at this point and have gotten the recipe down to an exact science. They are the perfect dessert or sweet treat when you need one, and make a decent meal when you need more like 7. They're stuffed with chocolate chips, which I think helps to totally mask the flavor stevia in the recipe. This is actually the FIRST recipe on this site using stevia because I've always been so hesitant to bake with it. But I am experimenting with it and so far, so good. Even Alex says these cookies pass his 'no after-taste' test, which is good, because a lot of sugar-less sweeteners don't! These cookies taste heavenly and indulgent, but are lighter and way more guilt-free than you'd ever imagine. Plus, CHOCOLATE. So go ahead, have four. You know I'm going to!
INGREDIENTS
1 tablespoon ground flax 3 tablespoons warm water 1 1/4 cup whole wheat pastry flour (or AP flour) 1 teaspoon baking soda 1/4 teaspoon salt 1/2 cup softened coconut oil 2 tablespoons brown sugar, maple syrup, or your favorite sweetener (optional) 3/4 teaspoon liquid vanilla stevia 1/2 teaspoon vanilla extract (double if using unflavored liquid stevia) 3/4 cup non-dairy chocolate chips DIRECTIONS Preheat oven to 350 degrees F. In a medium mixing bowl combine the flax and water, set aside to gelatinize. In a separate, larger mixing bowl whisk together the flour, baking soda and salt. Form a well in the center and set aside. In the medium mixing bowl with the flax mixture add the coconut oil, sugar or maple syrup, stevia and vanilla. Whisk to combine completely, then pour the mixture into the well formed by the dry ingredients. Use electric mixers to beat the mixture together until well combined. If not using an electric mixer, mix with a wooden spoon until you can't anymore, then finish it off with your hands. Once combined, pour in the chocolate chips and mix 'em in. Use a cookie scoop or spoon to scoop 1-inch balls onto a lined or lightly greased baking sheet. Bake for 10-12 minutes, or until the cookies are golden. Remove from the oven and move the cookies to a cooling rack. Enjoy! NOTES Makes about 18 cookies. Leftover cookies save well in a sealed container on the counter for up to a week.
Print Recipe
Purple Sweet Potato Pie Bars
Last week Alex and I took a day to start wedding planning together - FINALLY! So far, we have a venue, at The Riverbed Farm in Anaheim, and a date - June 10th, 2017, but other than that we've got nothing planned. Whoops! Time seems to be flying by at this point so my next big things to mark off the checklist are our save the dates and invitations, finding a caterer and finalizing details like the drink menu and decor. I'll have a post up soon on all the details and what we've learned so far in planning our vegan wedding!
In the meantime, a girl's gotta eat, and I've been loving all the fall produce we've been getting in our CSA box + seeing in supermarkets lately. We went on a date day last and ended up at a cute little kombucha + fermented goods bar in Costa Mesa called Farm + Culture Co. that served these yummy bites made with purple sweet potato and I was totally inspired. I wanted to create something similar, but with a little more focus on something sharable for the Fall season - so we came up with these Purple Sweet Potato Pie Squares. These pie squares are an incredibly gorgeous color - shockingly purple! - that just make you wanna eat 'em up. These bars are:
The sweet potatoes are paired with warm fall flavors like maple, cinnamon, and ginger on a chewy cashew-date-macadamia crust that makes them irresistible and much like a traditional sweet potato pie - but far healthier! They're are totally naturally sweetened, and you can omit the maple syrup if you prefer to keep them date-sweetened only. Eat them on their own or top them with a bit of whipped cream and a sprinkle of fresh nutmeg for the perfect fall treat. They're an indulgence you don't have to have any guilt about, so go ahead - have two!
INGREDIENTS
Cashew Date Macadamia Crust Layer: 1 1/2 cups cashews 1 cup macadamia nuts (or skinless almonds) 1 cup pitted dates 3 tablespoons coconut oil Purple Sweet Potato Pie Layer: 1.5 lbs purple sweet potatoes, boiled, skinned + mashed (about 2 1/2 cups mash) 3/4 cup unsweetened almond milk 3 tablespoons maple syrup 1 tablespoon coconut oil 1 tablespoon lemon juice 1 teaspoon vanilla 1/2 teaspoon ground ginger 1/2 teaspoon cinnamon 1/8 teaspoon nutmeg 1/8 teaspoon salt DIRECTIONS Cashew Date Macadamia Crust Layer: Soak the cashews and macadamia nuts in warm water for at least one hour. Drain off the liquid, and pour the soaked nuts into the food processor. Add in the pitted dates and coconut oil and process until a sticky crust forms. Grease or line a 9x9 inch glass baking dish. Scrape the crust mixture into the baking dish and use a rubber spatula to spoon to press the mixture firmly and evenly into the pan. Refrigerate or freeze to set the crust, about one hour, before topping with the sweet potato mixture. Wipe the processor bowl out with a paper towel and set aside. Purple Sweet Potato Pie Layer: Place the sweet potatoes into a large pot of water and bring to a boil. Cook until the potatoes are fork tender, about 10-15 minutes. Remove from the water and let cool completely. Once cooled, remove the skins and toss 'em into the compost or trash bin. Place the sweet potatoes into the processor bowl with the almond milk, maple syrup, coconut oil, lemon juice, vanilla, ginger, cinnamon, nutmeg, and salt. Process on high until the mixture is completely combined and smooth. Pour the mixture over the cooled crust layer and spread it evenly around. Place the baking dish back into the freezer to firm - they'll be much easier to slice this way. Once they're firm, about 3+ hours later, slice the bars even squares. Serve immediately or let soften in the fridge until you're ready to enjoy! NOTES Makes 16-20 bars. Leftovers can be saved in the fridge for several days or the freezer indefinitely. Purple Sweet Potatoes are different than Japanese Sweet Potatoes, which are purple on the outside but white on the inside. Make sure you double check or your pie squares - while delicious! - certainly won't come out looking like ours. Golden Milk: Hot or Iced!
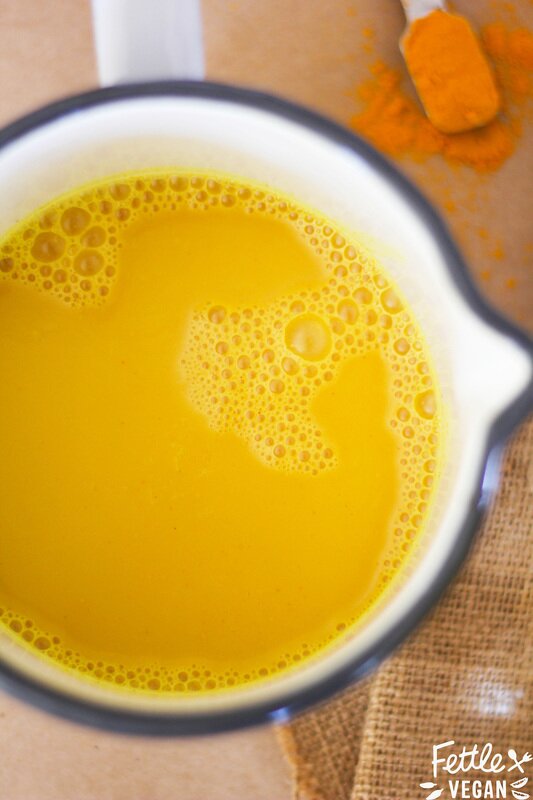
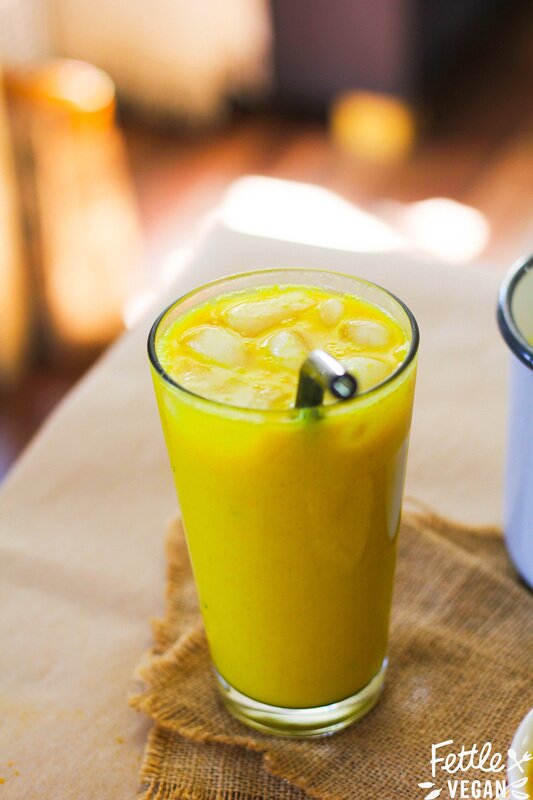
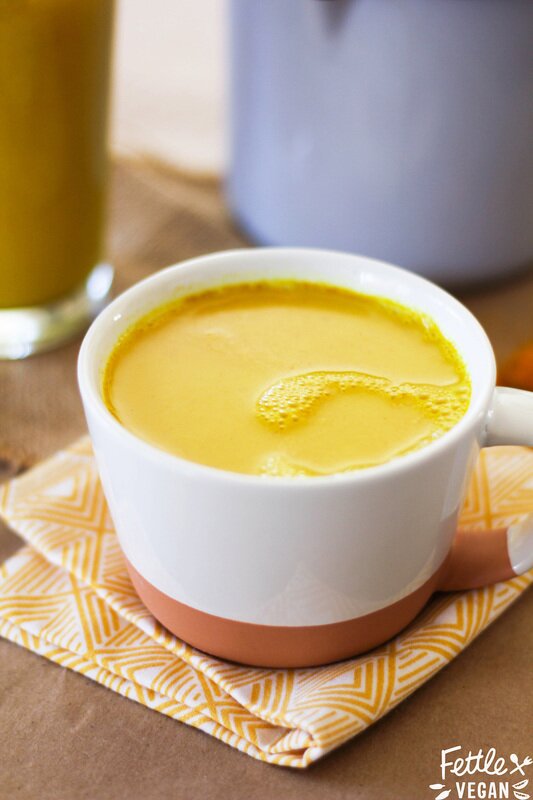
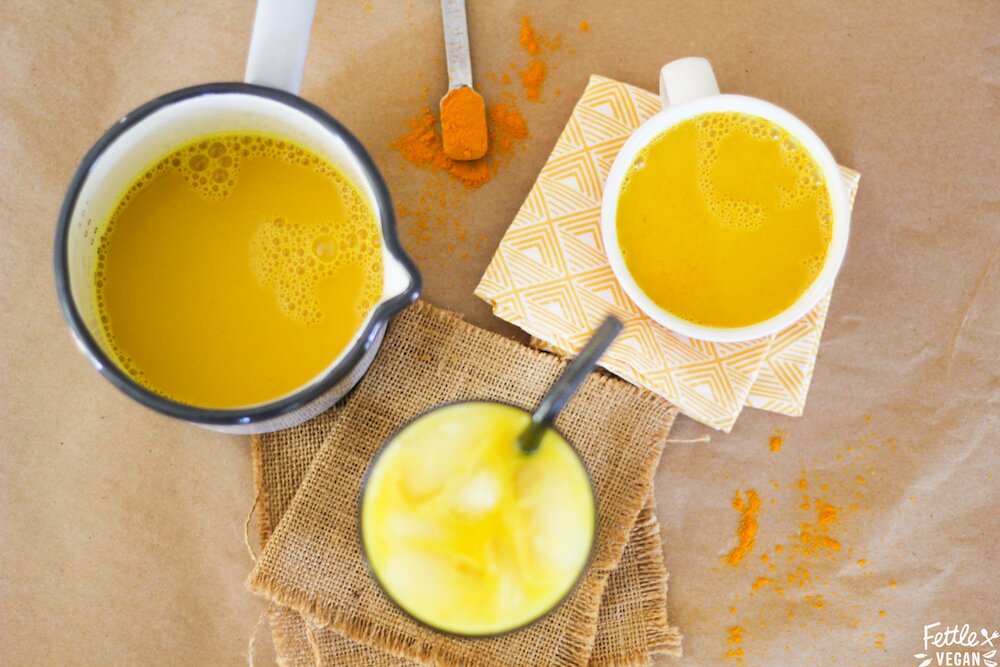
I'm a little late to the party when it comes to posting about golden milk, but I am OBSESSED. And I had to share this in case any of you haven't been lucky enough to stumble upon it yet. If you're still staring at me like 'What the heck is GOLDEN milk?' then let's back this caboose up a bit; Golden Milk is made from steaming milk and blending in spices, sweetener and vanilla to create a steamer that tastes similar to a chai or spiced tea, but is much creamier due to the milk, and a little warmer thanks to the addition of the turmeric. Golden Milk recipes have kind of exploded online lately, and I was lucky enough to try some at a friends a few months ago, where I totally fell in love with it. We'd also tried an amazing version by Califa Farms at Expo West this year, but it wasn't worth paying $4 a bottle for. So I've started making it myself at home! It's way cheaper and feels good knowing I can make an equally delicious version at home for about a tenth of the price.
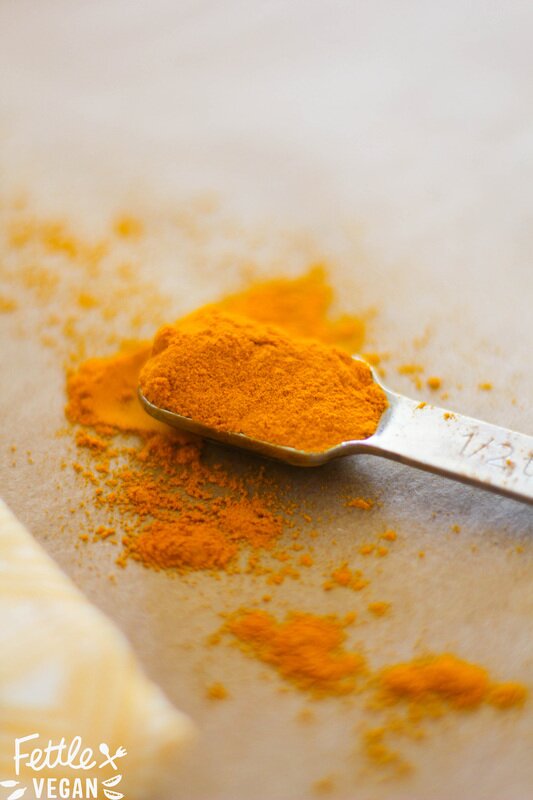
I love whipping one up whenever I want a sweet, warm drink or after a workout to help curb next-day soreness. Turmeric is a flavor you may recognize typically from curries, but but pairs perfectly with the sweetness of this drink. On top of being an anti-inflammatory, turmeric also boasts antioxidant and anti-depressant properties, as well as is considered a 'cure-all' spice for overall health and wellness in India. Plus, turmeric naturally whitens teeth! Seriously, just look up everything turmeric does - it's a pretty amazing little spice and something we should all be incorporating a bit more of into our daily lives. Which is why this super simple recipe is the PERFECT way to try it for yourself. Chances are you already have all the ingredients on hand to make it - so what're you waiting for? Cheers to your health!
INGREDIENTS
16 ounces (2 cups) almond or coconut milk 2-3 tablespoons maple syrup 1 teaspoon ground turmeric 1 teaspoon vanilla 1/2 teaspoon ground ginger 1/4 teaspoon cinnamon 1/8 teaspoon cardamom 1/8 teaspoon nutmeg pinch of black pepper DIRECTIONS Heat your almond or coconut milk in a small saucepan over medium heat (do NOT bring to a boil). Add in the maple syrup, turmeric, vanilla and other ingredients, whisking until the spices are completely dissolved. Simmer for 4-5 minutes, until the milk is hot and everything is well combined. Taste and adjust the flavors to your preference, if you like. Serve immediately OR let the milk cool to room temperature, then serve over ice. Refrigerated leftovers can either be reheated or served chilled over ice as well. NOTES Serves 1-2. Leftovers can be refrigerated and reheated or enjoyed over ice for up a week. Turmeric STAINS. Badly. Avoid using white dishes to cook or serve in unless you can wash them right after, and if you do get some turmeric stains on your countertop, I've read that vegetable oil and regular cleanser will usually get it off. Turmeric DOESN'T stain your teeth! It's actually proven to be a tooth whitener, so no need to brush your teeth after drinking unless your prefer it. Some people make this tea with fresh turmeric, whole cinnamon sticks, and fresh ginger. If that's what you prefer, we support you! Also, use whatever other spices you like - maybe some cloves or cayenne. We just use ground spices because they're convenient and encourage us to actually MAKE this! 😝
Print Recipe
PB + J Energy Bites
These PB + J Energy Balls are the bee's knees my friends! I made them by accident the other day while trying to make a healthy, satisfying, sweetish treat while cleaning out my cabinets. I didn't want to get the blender or food processor involved because they're a pain to clean, so these little cuties are stuck together using my favorite sticky ingredient: peanut butter! And because they're packed with PB, chia and flax they're packed with protein and healthy omega-3 fatty acids, too. Which makes these perfect for bringing along on a hike, picnic at the beach, or on your next road trip. Because we used freeze-dried strawberries here instead of fresh strawberries they last longer out of the fridge and are a little less messy that they would be normally. I passed some along to my sports trainer friend who LOVED them and said he'd love them as an after workout boost. Best of all? They're a 1-bowl recipe and take just minutes to make, so you'll be snacking in no time. So let's eat!
INGREDIENTS
1 cup oats 2/3 cup freeze dried strawberries, roughly chopped 1/3 cup ground flax seed 1/3 cup chia seeds 1/2 cup peanut butter 1/3 cup maple syrup or agave nectar 1 teaspoon vanilla extract DIRECTIONS In a medium bowl combine the oats, strawberries, flax and chia. Add in the peanut butter, maple syrup and vanilla extract and stir until thoroughly mixed. Use a spoon or cookie scoop to roll the mixture into 1" balls. Store in an airtight container and keep refrigerated for up to 1 week. Enjoy! NOTES Makes 16-20 1" balls.
Print Recipe
Goji Cranberry Sauce
I'm a little embarrassed telling you this, but I used to LOVE canned cranberry sauce. I haven't eaten it in a few years, since I started making my own, but growing up that was my jam. I looked forward to Thanksgiving just for the ribbed, cylindrical maroon-colored jelly that would PLOP onto a plate and get passed around. It had no chunks, no texture, was just smooth as jello and sweet as could be. It was probably made with corn syrup. I'd probably think it tastes a little gross now. So instead of trying it again and ruining my beautiful memories of smearing it on yeast rolls and eating it alongside my mashed potato and gravy pile, I have decided to remember it as it was: perfect, and delicious. And make a better version! Something much more adult-friendly and gut-friendly. This cranberry sauce is super easy and whip up and is packed with goji berries, a superfood similar in flavor and color to cranberries, but packing a whopping 100% of your daily value of Vitamin's C + B2. Plus they contain all 11 essential amino acids, making them a complete protein. Its the wayyyyy healthier, just as tasty, much more enjoyable version of the crap I used to eat, and I think you're gonna love it too. Did we mention there are just 4 ingredients in this sauce? 5 if you count water! Easy peasy. Let's eat!
Looking for more Thanksgiving side dishes? Check out our Cranberry Apple Walnut Stuffing, Garam Masala Roasted Acorn Squash, Celeriac Mashed Potatoes, and Easy Vegan Gravy!
INGREDIENTS
1 cup water 3/4 cup maple syrup 3 tablespoons lemon juice 12 oz. of fresh cranberries (we bought a bag at Trader Joe's) 3/4 cup goji berries DIRECTIONS Rinse and drain cranberries. In a large saucepan over medium heat, whisk together water, maple syrup and lemon juice. Add cranberries and goji berries, bring to a boil, and cover. Cook, stirring occasionally, for about 10 minutes, until about 3/4 of the cranberries have popped open and the juices are beginning to thicken. Turn heat to low and cook for 5 more minutes, whisking several more times. Remove from heat, let cool, and refrigerate at least two hours to set before serving. Enjoy! NOTES Makes about 3 cups. This sauce can easily be made the night before and refrigerated until ready to be enjoyed. Sauce saves well in an airtight container in the fridge for up to two weeks.
print recipe
<
|
tagsAll  RSS Feed RSS Feed
|
