Fresh Cherry Scones
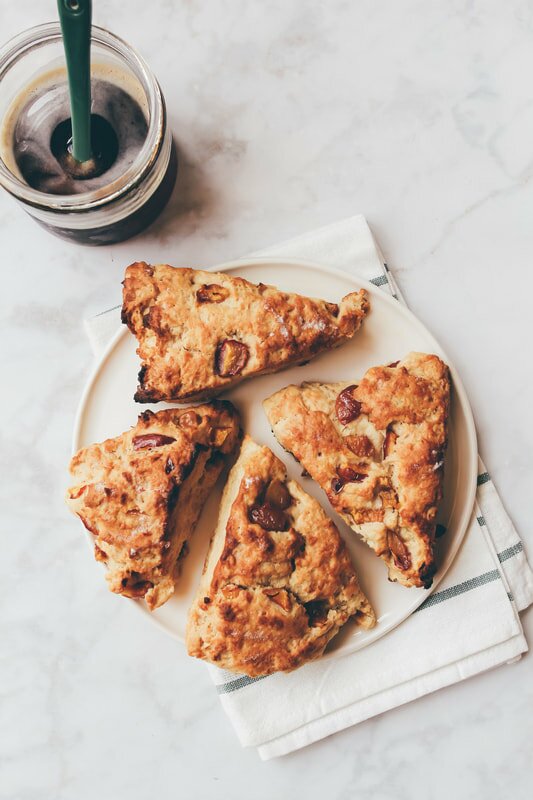
Guys, I love breakfast. It is my FAVORITE meal of the day. I love it sweet, savory, salty, sticky, soupy - any which way, I'm here for it! I'm also a HUGE fan of fresh cherries. As soon as they're in season I make my way to my farmer's markets and buy them up by the slightly overpriced pound. It's my favorite time of the year! So I combined my favorite meal with my favorite season and got these sweet, delicate, delicious beauties!
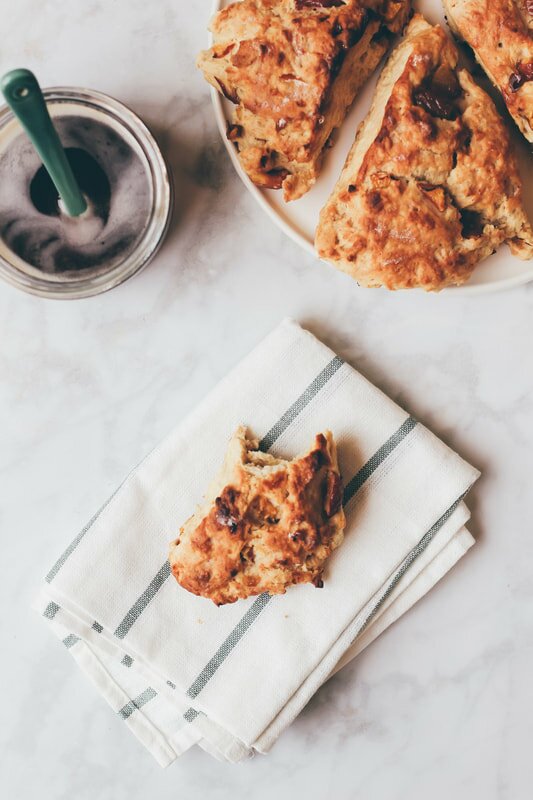
They're light and sweet but full of flavor and just the right amount of 'scone dry' - perfect alongside a glass of milk or a cup of tea. I kept them lower sugar and you can keep them even lower in sugar by skipping the maple drizzle altogether - your choice! Best of all, this scone recipe is super versatile so you can mix it up by adding in different fruits or flours and will always have success. I love it! I've thrown in raspberries, blueberries, even peaches, and they always come out totally brunch- and instagram- worthy.
If you love a good scone (and who doesn't?) then this recipe is for you. Just the right amount of moist and 'scone' dry, they whip up super easily and are easily made when you're ready to eat them but also last well overnight so you can bake ahead and sleep in before brunch, no stress. What're we doing still chatting? You've got some baking to do, babes!
INGREDIENTS
Cherry Scones 2 cups AP or whole wheat pastry flour 1 tablespoon baking powder 1/2 teaspoon ginger 1/2 teaspoon salt 6 tablespoons cold (vegan) butter 3/4 cup mashed banana or 2 eggs 1/4 cup almond milk 2 tablespoons maple syrup 1 teaspoon vanilla 1 heaping cup pitted and chopped fresh cherries Glaze 1/4 cup maple syrup (OPTIONAL - or check out our other scones glaze recipes below) DIRECTIONS Preheat the oven to 425ºF. Line a baking sheet with parchment paper. To make the scones, in a large mixing bowl, whisk together the flour, baking powder, ginger and salt. Using a pastry cutter or fork, cut in the cold vegan butter until small crumbs form. Pour in the mashed banana (or eggs), almond milk, maple syrup and vanilla and stir together with wooden spoon until a sticky dough forms. Fold in the fruit gently. Turn the dough onto a lightly floured surface and form a 1-inch thick disk. Cut the disk into 8 equal scone wedges, like a pizza. Place the scones on the prepared baking sheet and bake for 14-16 minutes, until golden. Place the scones on a wire rack to cool. While they cool, prepare the maple glaze by beating the maple syrup until it begins to aerate and get a little creamy. Drizzle the glaze over completely cooled scones and enjoy! NOTES Makes 8 scones. Leftovers save well sealed in an airtight container on the counter for up to 3 days. Longer than that, save frozen and heat in the toaster oven when ready to enjoy. Check out other scone recipes here: Vanilla Glazed Matcha Scones, Mini Chocolate Chunk Scones.
Print Recipe
6 Comments
WHISKEY BAKED PERSIMMON BREAD PUDDING
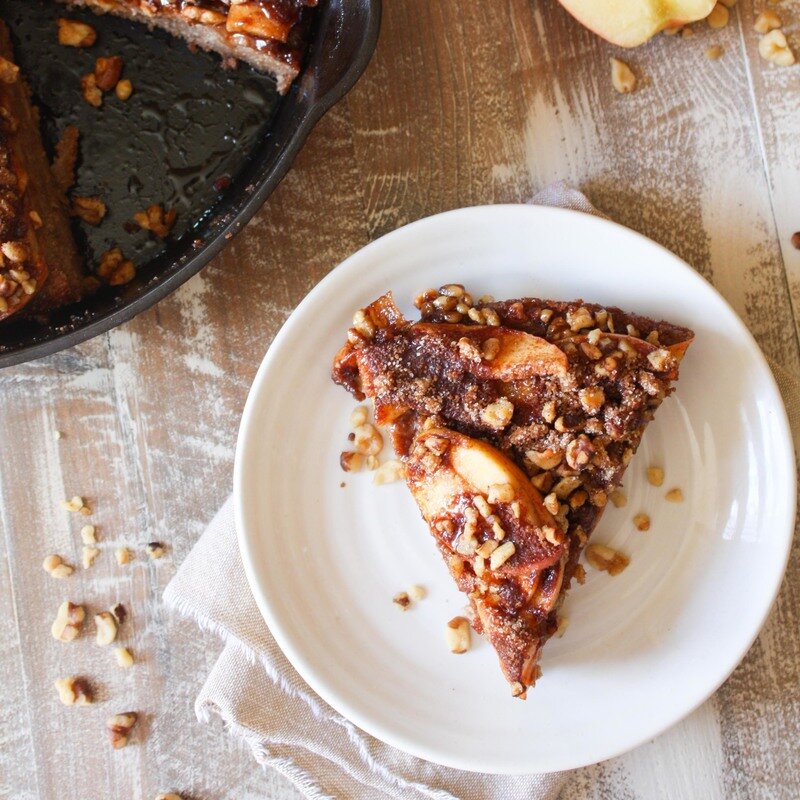
Hi friends! If you've been following along with my daily stories on IG, you know that it's been a crazy few weeks over here. I'm finally and officially certified as a power yoga and yoga sculpt instructor and I am SO excited about it! It's been a ton of work - I've been at the studio nearly every damn for the last 6ish months, since the day we got back from our Honeymoon. I'm exhausted! Plus, I've got my second cookbook in the works and also - the Holidays! So today I'm throwing it back AND recommending a great Holiday gift; This Whiskey Baked Persimmon Bread Pudding is SO good that I released it in my first cookbook, Homestyle Vegan, last year. But cool weather and fresh persimmons are back, and I knew I had to share. And if you still need a gift? My cookbook is on sale and is PACKED with delicious, plant-based recipes! Alright, that's the pitch. Moving on!
Bread pudding is just the worst name. It sounds like a soggy, sweetened, puréed loaf of bread and it deserves SO much more credit than that. This hearty bread pudding is stuffed with spiced, whiskey-baked persimmons and tossed in a rich coconut cream mixture before baking. It’s a super impressive looking and tasting treat, and is a great way to explore using sweet, seasonal persimmons. Persimmons not your jam? Try using your favorite stone fruit, instead. Let's bake, babes!
INGREDIENTS
6 heaping cups (375 g) stale french bread, cubed 4 persimmons, halved and thinly sliced 1/3 cup (80 ml) whiskey 1 teaspoon coconut oil 1 tablespoon (14 g) sugar 1/2 teaspoon ground ginger 1/2 teaspoon ground nutmeg 1/8 teaspoon cardamom 1- 14 oz. can (414 ml) full fat coconut milk 1 cup (240 ml) unsweetened almond milk 1/4 cup (60 ml) maple syrup 1 teaspoon vanilla 1/2 teaspoon ground cinnamon 1/2 teaspoon ground ginger 1/4 cup (36 g) cornstarch freshly grated nutmeg, for garnish DIRECTIONS Preheat the oven to 350º. Grease a 9x13 baking dish. Place the stale bread cubes into a large bowl and set aside. In a medium baking dish toss together the persimmons, whiskey, coconut oil, sugar, ginger, nutmeg and cardamom. Bake for 20 minutes, tossing again about halfway through. While the persimmons are cooking, whisk together the coconut milk, almond milk, maple syrup, vanilla, cinnamon, ginger and cornstarch in a saucepan. Cook over low-medium heat for 10 minutes, stirring frequently, until the mixture thickens. Once finished, pour the coconut milk mixture and the whiskey baked persimmons over the bread in the large mixing bowl. Mix to combine everything evenly, then pour the mixture into the prepared 9x13 inch baking dish. Let it sit for at least 20 minutes, then bake for 15-20 minutes. Serve immediately! NOTES Serves 6. Leftovers save well in the fridge up to one week. Purple Sweet Potato Pie Bars
Last week Alex and I took a day to start wedding planning together - FINALLY! So far, we have a venue, at The Riverbed Farm in Anaheim, and a date - June 10th, 2017, but other than that we've got nothing planned. Whoops! Time seems to be flying by at this point so my next big things to mark off the checklist are our save the dates and invitations, finding a caterer and finalizing details like the drink menu and decor. I'll have a post up soon on all the details and what we've learned so far in planning our vegan wedding!
In the meantime, a girl's gotta eat, and I've been loving all the fall produce we've been getting in our CSA box + seeing in supermarkets lately. We went on a date day last and ended up at a cute little kombucha + fermented goods bar in Costa Mesa called Farm + Culture Co. that served these yummy bites made with purple sweet potato and I was totally inspired. I wanted to create something similar, but with a little more focus on something sharable for the Fall season - so we came up with these Purple Sweet Potato Pie Squares. These pie squares are an incredibly gorgeous color - shockingly purple! - that just make you wanna eat 'em up. These bars are:
The sweet potatoes are paired with warm fall flavors like maple, cinnamon, and ginger on a chewy cashew-date-macadamia crust that makes them irresistible and much like a traditional sweet potato pie - but far healthier! They're are totally naturally sweetened, and you can omit the maple syrup if you prefer to keep them date-sweetened only. Eat them on their own or top them with a bit of whipped cream and a sprinkle of fresh nutmeg for the perfect fall treat. They're an indulgence you don't have to have any guilt about, so go ahead - have two!
INGREDIENTS
Cashew Date Macadamia Crust Layer: 1 1/2 cups cashews 1 cup macadamia nuts (or skinless almonds) 1 cup pitted dates 3 tablespoons coconut oil Purple Sweet Potato Pie Layer: 1.5 lbs purple sweet potatoes, boiled, skinned + mashed (about 2 1/2 cups mash) 3/4 cup unsweetened almond milk 3 tablespoons maple syrup 1 tablespoon coconut oil 1 tablespoon lemon juice 1 teaspoon vanilla 1/2 teaspoon ground ginger 1/2 teaspoon cinnamon 1/8 teaspoon nutmeg 1/8 teaspoon salt DIRECTIONS Cashew Date Macadamia Crust Layer: Soak the cashews and macadamia nuts in warm water for at least one hour. Drain off the liquid, and pour the soaked nuts into the food processor. Add in the pitted dates and coconut oil and process until a sticky crust forms. Grease or line a 9x9 inch glass baking dish. Scrape the crust mixture into the baking dish and use a rubber spatula to spoon to press the mixture firmly and evenly into the pan. Refrigerate or freeze to set the crust, about one hour, before topping with the sweet potato mixture. Wipe the processor bowl out with a paper towel and set aside. Purple Sweet Potato Pie Layer: Place the sweet potatoes into a large pot of water and bring to a boil. Cook until the potatoes are fork tender, about 10-15 minutes. Remove from the water and let cool completely. Once cooled, remove the skins and toss 'em into the compost or trash bin. Place the sweet potatoes into the processor bowl with the almond milk, maple syrup, coconut oil, lemon juice, vanilla, ginger, cinnamon, nutmeg, and salt. Process on high until the mixture is completely combined and smooth. Pour the mixture over the cooled crust layer and spread it evenly around. Place the baking dish back into the freezer to firm - they'll be much easier to slice this way. Once they're firm, about 3+ hours later, slice the bars even squares. Serve immediately or let soften in the fridge until you're ready to enjoy! NOTES Makes 16-20 bars. Leftovers can be saved in the fridge for several days or the freezer indefinitely. Purple Sweet Potatoes are different than Japanese Sweet Potatoes, which are purple on the outside but white on the inside. Make sure you double check or your pie squares - while delicious! - certainly won't come out looking like ours. Golden Milk: Hot or Iced!
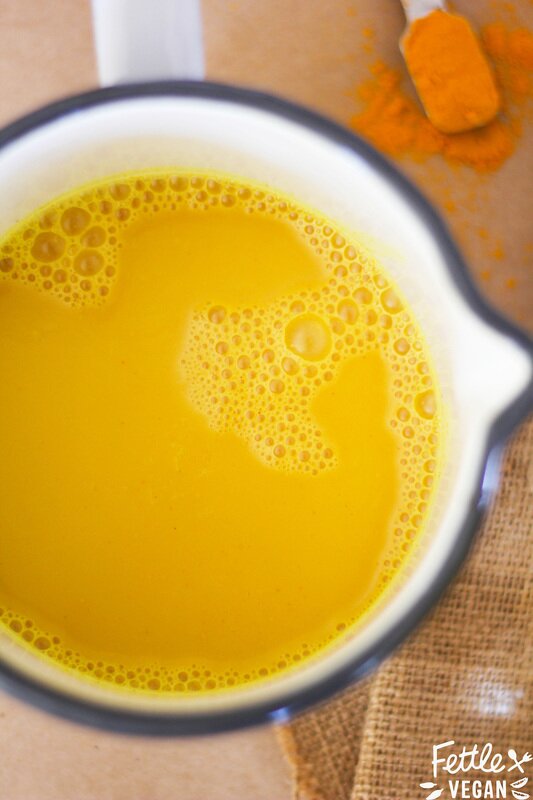
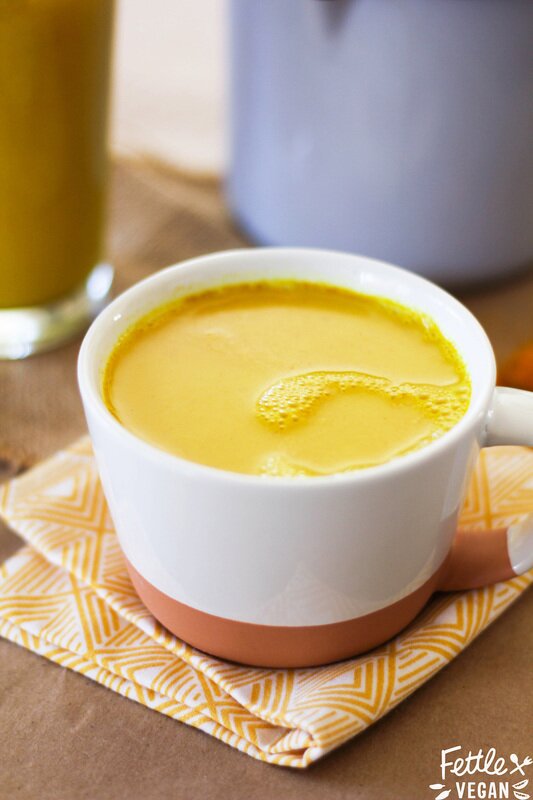
I'm a little late to the party when it comes to posting about golden milk, but I am OBSESSED. And I had to share this in case any of you haven't been lucky enough to stumble upon it yet. If you're still staring at me like 'What the heck is GOLDEN milk?' then let's back this caboose up a bit; Golden Milk is made from steaming milk and blending in spices, sweetener and vanilla to create a steamer that tastes similar to a chai or spiced tea, but is much creamier due to the milk, and a little warmer thanks to the addition of the turmeric. Golden Milk recipes have kind of exploded online lately, and I was lucky enough to try some at a friends a few months ago, where I totally fell in love with it. We'd also tried an amazing version by Califa Farms at Expo West this year, but it wasn't worth paying $4 a bottle for. So I've started making it myself at home! It's way cheaper and feels good knowing I can make an equally delicious version at home for about a tenth of the price.
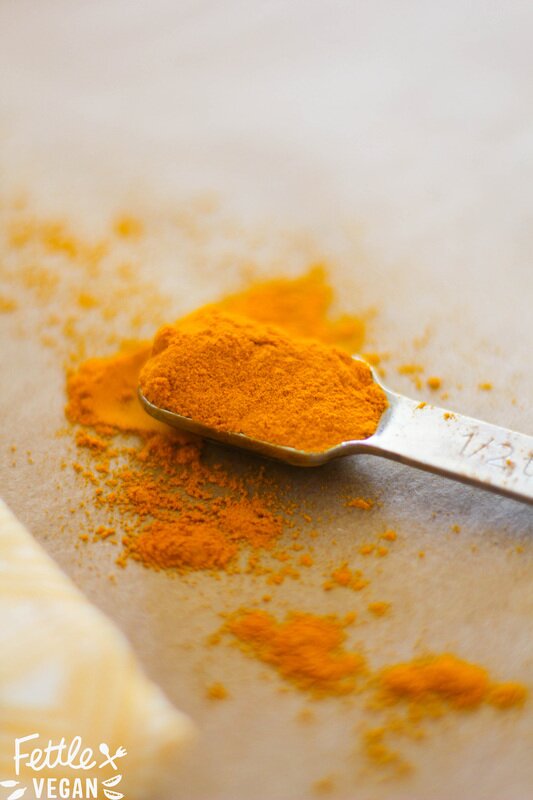
I love whipping one up whenever I want a sweet, warm drink or after a workout to help curb next-day soreness. Turmeric is a flavor you may recognize typically from curries, but but pairs perfectly with the sweetness of this drink. On top of being an anti-inflammatory, turmeric also boasts antioxidant and anti-depressant properties, as well as is considered a 'cure-all' spice for overall health and wellness in India. Plus, turmeric naturally whitens teeth! Seriously, just look up everything turmeric does - it's a pretty amazing little spice and something we should all be incorporating a bit more of into our daily lives. Which is why this super simple recipe is the PERFECT way to try it for yourself. Chances are you already have all the ingredients on hand to make it - so what're you waiting for? Cheers to your health!
INGREDIENTS
16 ounces (2 cups) almond or coconut milk 2-3 tablespoons maple syrup 1 teaspoon ground turmeric 1 teaspoon vanilla 1/2 teaspoon ground ginger 1/4 teaspoon cinnamon 1/8 teaspoon cardamom 1/8 teaspoon nutmeg pinch of black pepper DIRECTIONS Heat your almond or coconut milk in a small saucepan over medium heat (do NOT bring to a boil). Add in the maple syrup, turmeric, vanilla and other ingredients, whisking until the spices are completely dissolved. Simmer for 4-5 minutes, until the milk is hot and everything is well combined. Taste and adjust the flavors to your preference, if you like. Serve immediately OR let the milk cool to room temperature, then serve over ice. Refrigerated leftovers can either be reheated or served chilled over ice as well. NOTES Serves 1-2. Leftovers can be refrigerated and reheated or enjoyed over ice for up a week. Turmeric STAINS. Badly. Avoid using white dishes to cook or serve in unless you can wash them right after, and if you do get some turmeric stains on your countertop, I've read that vegetable oil and regular cleanser will usually get it off. Turmeric DOESN'T stain your teeth! It's actually proven to be a tooth whitener, so no need to brush your teeth after drinking unless your prefer it. Some people make this tea with fresh turmeric, whole cinnamon sticks, and fresh ginger. If that's what you prefer, we support you! Also, use whatever other spices you like - maybe some cloves or cayenne. We just use ground spices because they're convenient and encourage us to actually MAKE this! 😝
Print Recipe
Ginger Garlic Roasted Carrots
I love this recipe because it's easy, full of flavor, and will make your dinner guests think you went to a lot of trouble - when all you had to do was sprinkle some herbs and bake. Okay, so there is slightly more to it than that, but you get the gist: it's easy! Carrots are usually drowned in sugar at the Holiday table, stuffed into brown sugar syrups and caramelized, even though they're pretty sweet on their own. Our take on these gorgeous heirlooms is rather to add a little flavor and spice and let the carrot flavor shine through, 'cause cooked carrots are delicious and don't deserve to be smothered by sugar! The combination of fresh ginger and garlic adds a ton of savory, salty flavor and the fresh thyme just accents the combo. These would be perfect as a side dish at your Holiday gathering or as a quick addition to a normal Monday night meal - everyone will love them! Let's get cookin'.
INGREDIENTS
1.5 lbs heirloom rainbow carrots (regular orange carrots work great, too!) 1-2 tablespoons olive OR coconut oil 6 cloves garlic, minced 2 teaspoons fresh ginger, grated 1/2 teaspoon salt 1/4 teaspoon ground pepper fresh thyme, for garnish DIRECTIONS Preheat oven to 425 degrees. Wash the carrots and remove any green tops. Chop the larger carrots in half lengthwise, and lay the carrots on a lined baking sheet. Drizzle with the oil and sprinkle the garlic, ginger, salt and pepper over the top. Use your fingers to gently flip the carrots, covering them as evenly as possible in the oil and spices. Bake for about 30 minutes, flipping about halfway through. Carrots are done when they are fork tender and beginning to brown. Remove from oven, sprinkle with fresh thyme, and serve immediately! NOTES Serves 4. Leftovers can be reheated in a low-heat oven or a microwave, but are best enjoyed fresh. They will last, covered in the fridge, about a week.
Print Recipe
Gingersnap Buttercream Cookie Sandwiches
The holidays are in full-swing, which means we're baking like maniacs over here! Between the parties with friends and family, gifts for co-workers, and recipe testing for the cookbook (out Fall 2016!), our oven have been getting plenty of use and my waistline is feeling a little larger than usual. But that's okay, because there are only a few weeks left and by then we'll be so sick of cookies and baked goods we won't want anything to do with them for months. But for now, I'm all about that perfect chewy cookie. And these, my friends, are two perfectly chewy, spiced cookies sandwiching a rich buttercream frosting...and they are DAMN good! Using fresh ginger and nutmeg in these cookies really make the flavors rich and bright, and the molasses help keep 'em chewy - and adds some iron and calcium so you can pretend they're a health food. That's how that works, right?
My favorite part of these cookies is that I like them. I mean it! For years, I have avoided ginger and molasses cookies. I never like the weird sticky-sweet flavor of them and though they tasted kind of bland or too molasses-y. But these cookies? These are mind-changing, crowd-pleasing, are packed with spicy ginger flavor and just enough sweet molasses to balance out the bite of the ginger. Wanna cut the sugar? Skip the buttercream frosting and just eat the cookies as is, they're pretty darn delicious on their own!
INGREDIENTS
Cookies: 1 1/4 cups all purpose flour 1 teaspoon baking soda 1/2 teaspoon baking powder 1/2 teaspoon salt 1/2 teaspoon cinnamon 1/4 teaspoon freshly grated nutmeg 3/4 cup packed brown sugar 1/2 cup coconut oil, solid (OR sub vegan butter) 3 tablespoons ground flax 3 tablespoons molasses 2 tablespoons fresh ginger, grated 1 teaspoon vanilla Buttercream filling: 2 cups powdered sugar 1/4 cup vegan butter 1 teaspoon vanilla 1-2 tablespoons unsweetened non-dairy milk fresh nutmeg, for garnish DIRECTIONS Preheat oven to 350 degrees. In a large mixing bowl combine flour, baking soda, baking powder, salt, cinnamon and nutmeg. In a separate bowl or stand mixer cream together the brown sugar and coconut oil. Stir in the ground flax, molasses, ginger, and vanilla until completely combined. Pour the dry ingredients into the wet about a cup at a time, stirring continuously, until the cookie dough comes together. Scoop 1-in balls of cookie dough onto a lined baking sheet and bake for 10-12 minutes, until edges are firm. Move the cookies to a wire rack to cool. While the cookies bake and cool, prepare the buttercream frosting by beating together the powdered sugar, butter, and vanilla. Add in milk a bit at a time, until the desired frosting texture is achieved. Spread the buttercream onto half of the cooled cookies, and move to the fridge or freezer for 10 minutes to firm the frosting before topping it with another cookie. Once the sandwiches have been assembled, grate fresh nutmeg over the sandwiches and gobble 'em up! NOTES Makes 20 cookies, or 10 cookie sandwiches. After the cookies cooled, we placed some of the frosting on top and then place them in the freezer for 10 minutes to set the frosting before placing the second cookie on top. Otherwise, the frosting tends to smoosh out the sides a bit. If you won;t be serving them immediately, I recommend keeping them in the fridge until just before serving.
Print Recipe
Sesame Ginger Blistered Shoshito Peppers
INGREDIENTS
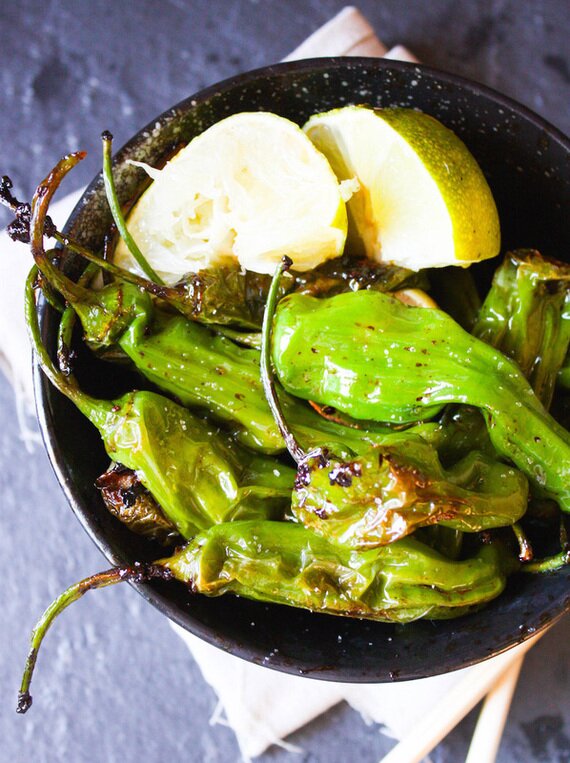
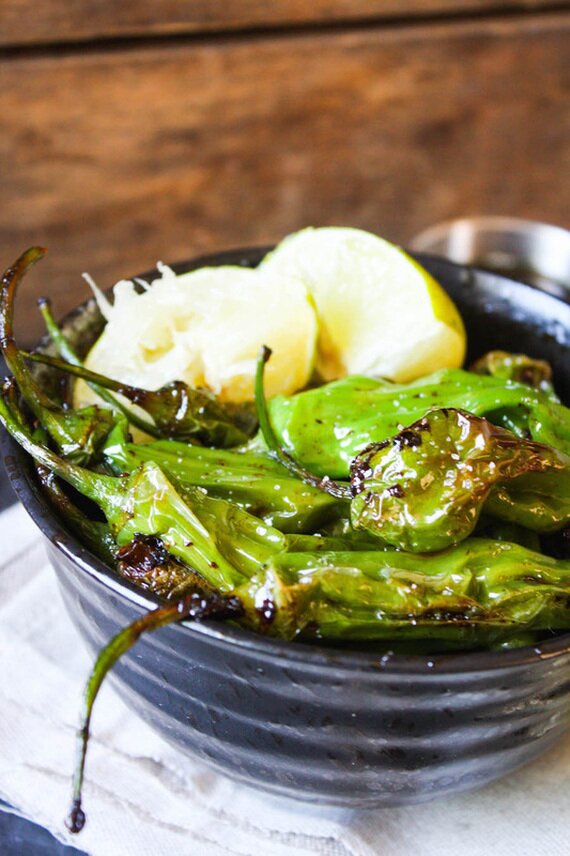
6 ounces Shoshito Peppers, washed 1 tablespoon coconut oil 1 tablespoon soy sauce or tamari 1 tablespoon toasted sesame oil 1 tablespoon fresh lime juice 1 teaspoon maple syrup 1 teaspoon fresh ginger, minced 1 clove garlic, minced 1/4 teaspoon of chili oil (optional) pinch of salt DIRECTIONS Wash the peppers and heat the coconut oil in a large skillet over medium-high heat. While the oil heats, combine soy sauce, sesame oil, lime juice, maple syrup, ginger and garlic in a small bowl. Toss the peppers into the skillet, then pour in the sauce. Sauté for 5-8 minutes, stirring frequently to coat the peppers in sauce. Continue stirring until peppers become evenly blistered (lightly browned and covered in small air pockets). Remove from heat, and serve immediately with a squeeze of fresh lime and soy sauce or spicy Chinese mustard. Enjoy!
This was a super quick + easy lunch I was inspired to make after first trying shoshitos at sushi place in Seal Beach a while back. They were salty, a bit crunchy, and had just a touch of spiciness. So good! I wanted to do a little spin of my own and included fresh ginger and garlic- 'cause they're my favorite. The sesame ginger sauce was AMAZING and a perfect pair with these sweet peppers! My only addition would be sprinkle of sesame seeds for texture. (I was in a bit of a time crunch, so excuse the not-as-fancy iPhone photos on this one.) They're great as a snack or alongside a dinner with rice and kung pao cauliflower. We found our shoshito peppers at Trader Joe's, but you should be able to find them at any nicer grocery stores or Asian markets. You're gonna love 'em- especially since they're just about 10 minutes, start to finish. Let's eat!
print recipe
Persimmon & Ginger Tart
Until a few years ago, I had never tried a persimmon. I grew up in Maine, where anything but local produce can be hard to find, and in the winter time, it can be hard to find any produce at all. Needless to say, I had long since moved to California when I got my first taste of these little beauties. Native to China, they were introduced in California sometime in the middle of the 19th Century, and Americans have been hooked ever since. They have a delicate flavor, sweet with a little tang, and are great in baked goods or sliced with a sprinkle of cinnamon and sugar. I've seen loads of persimmon based muffins, cookies, crumbles, and cakes lately, so I decided to make my own version: a buttery, flaky gluten-free crust (yes it CAN be done!) under a rich, gingery cheesecake middle, topped with sugared persimmon slices and finished with a sweet smattering of coconut whip. This dessert is low sugar, so pretty guilt-free, and a crowd-pleaser- we shared with our friends and it was gone in one night! It would make a great Thanksgiving dessert and takes about an hour to throw together. We hope the friends at your table love it as much as ours! Let's eat.
INGREDIENTS:
Buttery Crust: 2 cups gluten-free flour blend (we used Bob's Red Mill 1:1 GF Baking flour) 1/4 teaspoon xantham gum (only if your flour blend doesn't include any, and even then- optional) 1/8 teaspoon salt 2/3 cup vegan butter 9-12 tablespoons ice cold water Ginger Cashew Cream: 2 cups cashews, soaked for at least 30 minutes in warm water 3/4 cup water 1/3 cup maple syrup 1 tablespoon fresh ginger, or about a 1-inch chunk 1 1/2 teaspoons vanilla 1/4 teaspoon nutmeg Persimmon Topping: 4 persimmons, thinly sliced 2 tablespoons sugar 1/4 teaspoon ground ginger Coconut Whip: 1 can full fat coconut milk 3-6 tablespoons powdered sugar 1-2 teaspoons vanilla INSTRUCTIONS: Buttery Crust: 1. To prepare the buttery crust, mix flour, xantham if using, and salt in a large bowl, then cut in butter using a fork or pastry butter until crumbs form. Drizzle tablespoons of ice cold water one at a time over the mixture, using a wooden spoon to stir and work the liquid in until a dough begins to form. Add water until dough is moist enough to form a ball but not too sticky to knead. Add more flour, a little at a time, if needed. Once dough is prepared, roll out to about 1/4 thickness and press into your 11-inch tart pan, being sure to line the edges as evenly as possible. I use the back of a wooden spoon to press the dough evenly into the tart pan. Once finished, place in fridge to chill while you prepare the rest of the ingredients. Ginger Cashew Cream: 2. In a high-speed blender or food processor, combine soaked and drained cashews, water, maple syrup, ginger, vanilla and nutmeg and blend on high for about 1 minute, until mixture is completely creamy and smooth. Pour the mixture into your prepared crust and set aside. Persimmon Topping: 3. Wash and thinly slice the persimmons, discarding the ends. Toss persimmons in sugar and ground ginger mixture, then arrange them around the tart, starting on the outside and working your way in, overlapping the persimmon slices slightly. Bake the tart, uncovered, at 375 degrees for 30-35 minutes. Remove, let cool, and serve with coconut whip. Coconut Whip: 4. Refrigerate coconut milk overnight, being careful not to shake or jostle cans. Once you're ready to make the whip, gently open the can and use a spoon to remove the thick white layer of coconut from the top half of the can, leaving the clearish liquid left at the bottom. Put the thick white cream into a mixing bowl with the sugar and vanilla. Mix with hand beaters until mixture is smooth, creamy, and whipped up. Serve a dollop with each slice of tart! Leftovers can be refrigerated for several days, re-fluffing with beaters as necessary. 5. To serve, slice tart into pie-slices, then top with coconut whip and a sprinkle of nutmeg. Save leftovers, covered in the fridge, for up to a week. Enjoy!
print recipe
Pumpkin Spiced Steamer
Pumpkin spice latté season has ARRIVED! As the weather gets cooler and cozier (pretty much everywhere except Southern California), the lines at Starbucks are getting longer and vegans everywhere wish they could take part. WHY STARBUCKS, WHY must you put dairy in your pumpkin spice mixture?! Trust me, we vegans love our pumpkin. You'd make a lot of money off of us if you made 'em vegan! But since you don't, we'll find our own, far healthier ways to enjoy delicious seasonal drinks. In our house though, we're just not coffee drinkers. We love tea, and occasional caffeine, but for the most part we're more of a 'chai latté' kinda couple. Keepin' it low key, ya know?
So THIS is how we get our fix. A frothy, foamy, sweet, pumpkin-y cup of steamed dairy-free milk blended with cinnamon, nutmeg, and ginger. It's fall, all wrapped up in a mug. Topped with a spoonful of coconut whip would be lovely, but this drink stands just fine on its own. Its the perfect fall drink for those avoiding caffeine or who just want a kid-friendly version. We know you're going to love it. And in case you forgot, it's GREAT PUMPKIN WEEK here on the site, so check the sidebar to keep up with all the pumpkin recipes!
INGREDIENTS:
16 ounces cold, dairy-free milk (we prefer coconut!) 3 tablespoons pumpkin purée 2 tablespoons maple syrup 1/2 teaspoon vanilla extract 1/8 teaspoon ground ginger 1/8 teaspoon cinnamon 1/8 teaspoon nutmeg 1/8 teaspoon pumpkin pie spice (optional, just enhances the pumpkin flavor!) DIRECTIONS: In a saucepan, heat your milk on low to medium heat. Whisk in the pumpkin purée, maple syrup, vanilla, and spices. Heat to desired temperature, stirring occasionally. If you have a milk frother (we have an attachment on our hand mixer), pour the milk into a large mug -or two smaller ones- and froth milk on high to create a thick foam. If you don't have a milk frother, pour the hot mixture into a high speed blender and blend 20-30 seconds, until a thick foam is created. Pour into mugs, and enjoy! Leftovers can be refrigerated and reheated later.
print recipe
Spiced Pumpkin Bread with Maple Vanilla Icing
Prepare yourselves: the weathers getting cooler and it's about to get all kinds of pumpkin up in here. After walking the aisles of Trader Joe's last week and seeing pumpkin-themed snacks EVERYWHERE, I was inspired. Last year at this time I was so sick of pumpkin. I'm not even sure we posted one pumpkin recipe on this site last fall. Lame, right?
This year, lucky (or maybe unlucky?) for you, I've jumped back on the pumpkin bandwagon. HARD. The next couple of weeks will be filled with pumpkin treats both sweet and savory...but mostly sweet. I promise not to overdo it. And I promise you will find at least one pumpkin goodie to love. In fact, we're calling it 'GREAT PUMPKIN WEEK' here this week. Use the handy pumpkin on the homepage sidebar to explore ALL of our pumpkin-filled recipes! Now, let's BAKE!
INGREDIENTS:
Spiced Pumpkin Bread 1- 15 oz. can pumpkin purée (about 1.5 cups) 1/3 cup softened coconut oil 1/2 cup organic sugar 1/2 cup non-dairy milk 1 teaspoon vanilla extract 1 teaspoon apple cider vinegar 2 cups whole wheat OR gluten-free flour blend 1/2 teaspoon baking soda 1/2 teaspoon baking powder 1/2 teaspoon salt 1/4 tsp ground cinnamon 1/8 tsp ground ginger Maple Vanilla Icing 1.5 cups raw cashews, soaked 3 tablespoons maple syrup 1.5 teaspoons vanilla extract 1/4 - 1/3 cup water DIRECTIONS: Preheat oven to 350 degrees. In a large mixing bowl, combine coconut oil, sugar, milk, vanilla, & vinegar. Let sit for 3-5 minutes. While you wait, grab a second mixing bowl & combine the flour, baking soda, baking powder, salt, cinnamon, and ginger. Once the wet ingredients are ready (slightly bubbly), slowly add in the dry ingredients and stir to combine. Once the two are completely combined and a batter has formed, add the pumpkin purée. Stir to combine. Pour batter into a greased, lined or non-stick loaf pan. [We used a non-stick pan with a little parchment paper, for easy removal.] Bake for 45-60 minutes, depending on your oven. Bread is finished when a toothpick comes clean. Remove from the oven and let cool at least 30 minutes before transferring to a wire cooling rack. While bread cools, whip us icing by combining soaked cashews, maple syrup, vanilla, and water in a food processor or high speed blender. Fill a piping bag or ziploc bag with a corner cut off with icing mixture and pipe icing over cooled loaf. Loaf lasts well on the counter or in the fridge for about a week, or can be frozen indefinitely. Enjoy!
print recipe
<
|
tagsAll  RSS Feed RSS Feed
|
