Cranberry Orange Clafoutis
Clafoutis, pronounced KLA-FOO-TEE, is a French dessert that is custard-y in texture and studded with fruit. Cherries seem to be the traditionally paired flavor, but since cranberries are in season and have such a great tart flavor, we used them instead. They work nicely to balance out the sweet, eggy flavor and texture of the cake, and they taste all kinds of seasonal with a bit of added orange zest. It works as a breakfast dish or dessert, and is an impressive looking one, at that! This recipe is deceptively simple and makes you seem like a real chef, especially when you start throwing around words like 'clafoutis' and 'aquafaba'. If you haven't jumped on the aquafaba train, you can check out some more info on other recipes we've used it in, like our Easy Chickpeasy Breakfast Burritos + our Homemade Marshmallow Fluff. We used aquafaba in this dish because it so closely mimics the protein structure in baked goods that eggs do, and helped to almost perfectly mimic the texture of a traditional clafoutis. We considered using flax or chia eggs, but I just don't think it would've given the same texture, and like we said before, texture is key in this dish. Anyway, enough chatting. You get it. Fancy dessert, very little work. So what're you waiting for? Let's eat!
INGREDIENTS
1 cup unsweetened almond milk 1/2 cup + 1 tablespoon aquafaba 1/2 cup sugar 2 tablespoons melted vegan butter 2 teaspoons vanilla 1 teaspoon orange zest 1/2 cup all purpose flour 1 cup fresh cranberries powdered sugar, for garnish DIRECTIONS Preheat oven to 325 degrees. In a large mixing bowl combine almond milk, aquafaba, sugar, melted butter, vanilla and orange zest. Add in the flour, whisking until smooth. Pour the batter into a greased 8-inch cast iron pan or baking dish. Scatter the cranberries over the top and place the whole pan into the oven. Bake for 50-60 minutes, until dough is puffed and golden along the edges. Remove from the oven and let it sit at least 2 hours to set. The result should be very custard-like, a thick 'pancake' similar to flan. Sprinkle with powdered sugar + serve! NOTES Aquafaba is the magical liquid drained from a can of beans. Garbanzo or white beans work best. You can read more about that here. Texture is key in this dish. Don't dig in too early or the base won't set properly. It might seem undercooked or a little jiggly when you first pull it out of the oven, but I promise, that's what you want. However, if the sides haven't browned up, you'll want to keep it in a few extra minutes. Cranberries not your jam? Use your favorite berries or stone fruit here instead! ***We've gotten a LOT of questions about this recipe. I swear it is as easy as it looks BUT PLEASE read through the entire recipe completely before beginning. And yes, your pan should be greased...like its says. :) ***
print recipe
21 Comments
Easy Miso Gravy
You know what's better than gravy that's ready in just over 5 minutes? ALMOST NOTHING. Gravy is like my lifeblood - I could eat it slathered on just about any vegetable and I think it makes everything taste better. A good gravy, that is. I'm not much for store-bought packets, so whenever I want gravy I follow pretty much this exact recipe and whip up a batch to dump on everything. And since I've made it so many times, I've gotten pretty darn good at it. So good at it, I figured it was about time I shared it with you guys. And just in time for Thanksgiving! Kitchen time on Tofurkey Day is valuable, so who wants to waste it slaving over an hour long gravy recipe? NOT YOU! And sure as heck not me. So grab a pan, whip up a batch of this easy, flavorful gravy, and go smother some mashed potatoes in it. Or share it with our friends at the dinner table, if that's your jive turkey. Let's eat!
Looking for more Thanksgiving sides? Check out our Celeriac Mashed Potatoes, Lemon Miso Cranberry Sauce, and Homemade Tofurky!
INGREDIENTS
2 tablespoons vegan butter 1/4 cup flour (AP or WW) 2 cups vegetable broth 1 teaspoon miso paste 1/4 teaspoon onion powder 1/4 teaspoon ground pepper DIRECTIONS In a small cast iron pan (or sauce pan, but we like the flavor and the way the butter browns a bit more in cast iron) melt the butter over medium heat. Once melted, stir in the flour. The mixture will be chunky. Stir and let brown for 1-2 minutes, then pour in vegetable broth, miso paste, onion powder and pepper. Whisk vigorously until completely combined. Continue to cook over medium heat, stirring occasionally for 3-4 minutes, until the mixture is bubbling and thickening. Turn the heat to low and simmer a few more minutes, until your desired gravy thickness is achieved. Serve immediately! NOTES Makes about 2 cups. If you don't have flour/ want to keep it GF, you can substitute cornstarch. Start with an equal amount and use more to thicken as needed. Leftovers can be refrigerated up to a week in an airtight container.
PRINT RECIPE
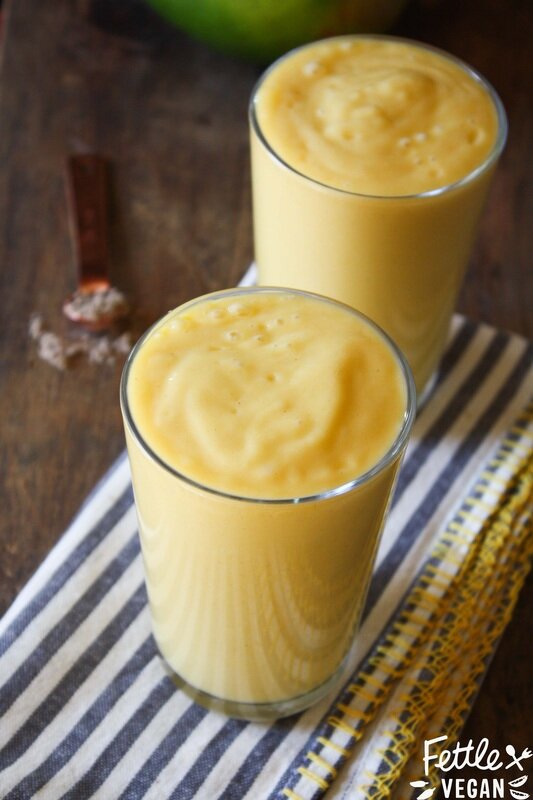
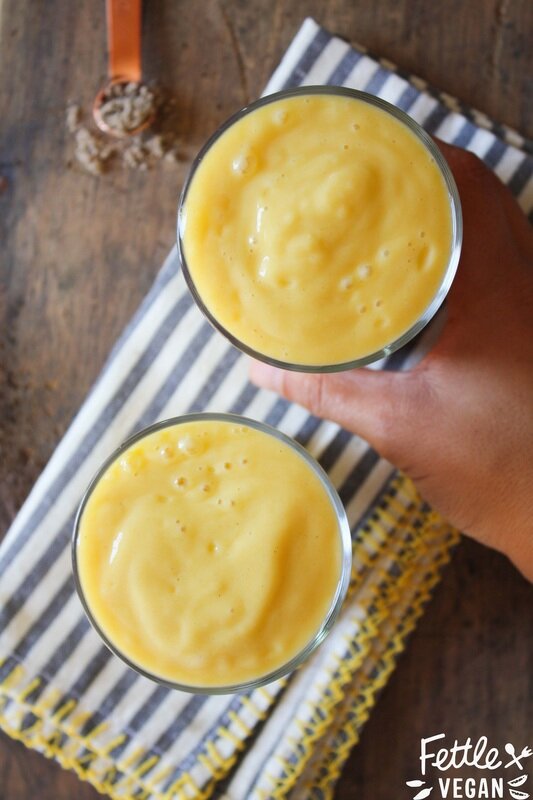
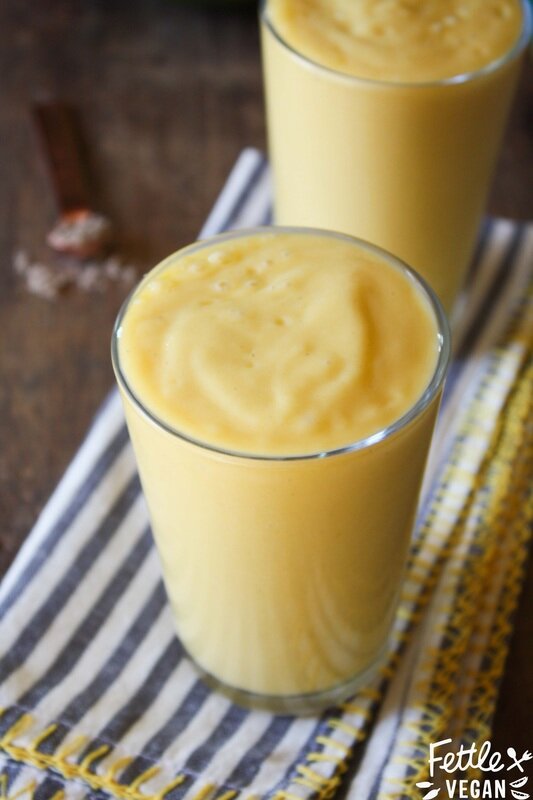
Mango Lassi
The first Lassi, a traditional Indian-style drink made with yogurt, fruit, and spices is said to have been whipped up as early as 1000 B.C. Lassi's are a cooling drink, so people would drink them to beat the scorching heat and help cool down their mouths after a spicy dish. Mango Lassi's tend to be the most common flavor, but they can be made many different ways. Since we're still suffering from a heat wave over here in Southern California while everyone else enjoys crisp fall mornings and changing leaves, I decided to whip up one last Summer-worthy, beat-the-heat treat. We veganized the traditional Lassi recipe and kept it sugar-free, since the mango really adds plenty of sweetness itself. It's a guilt-free drink that tastes great and actually does help cool you down in the heat! I was sippin' glasses full all day yesterday. Also, instead of using water to mix with our yogurt, which is traditionally how a Lassi is made, we used sugar-free homemade almond milk which added a bit more creaminess while still keeping the drink healthy and delicious. Even if you're not suffering a heat wave, this drink becomes the perfect way to use up all the end-of-season mangoes on sale at the market right now in a fun, new way. And the leftovers of your drink can be left in the fridge and enjoyed for up to three days after, though it may need a good stir. Drink up!
INGREDIENTS
3 cups fresh mango 1/2 cup plain, unsweetened vegan yogurt (we used a cashew based yogurt, but soy, almond or coconut should work just fine here) 1/2 cup coconut milk 1/2 cup ice 1/4 teaspoon ground cardamom DIRECTIONS In a high speed blender combine manage, yogurt, coconut milk, ice and ground cardamom. Split between two tall glasses, or half the recipe for a single serving. Leftovers can be refrigerated up to three days, but it is best served fresh and cool. Enjoy! 'California Burrito' Tacos
If you're from anywhere else in the US and you think you know what good Mexican food is, I can tell you straight up: YOU'RE WRONG. Only in Southern California can you get authentic, traditional, spicy Mexican dishes made with love. And of course in California, we like to mix things up. Do it our way, you know? Thats probably why San Diego has become famous for putting its own twist on traditional carne asada burritos and adding french fries. Maybe it was the surfers who did it first, maybe we'll never know, but ordering a California Burrito anywhere in So Cal means that you're getting a stuffed burrito - including french fries. And it is DAMN delicious. The french fries add a bit of crunch and flavor to the burrito and help balance out the spiciness from the 'meat' and must-have hot sauce. Because we're such big Beyond Meat fans we used their beefy crumbles as our meat substitute and loved it. You can make your own french fries or buy your favorite frozen ones and bake 'em up, but either way this is a MUST TRY. In this recipe we made the traditional burritos into tacos for two reasons; first, we love tacos (who doesn't?), and second we have a hard time finding big flour tortillas that don't contain a bunch of sketchy ingredients. Tortillas should just be flour, water, salt and lime. Anything else, especially gross preservatives, and you can count me out. Instead we bought small organic corn tortillas and doubled 'em up, traditional style, and then put all our fillings (including a heart handful of french fries) inside. Add a squeeze of lime, a sprinkle of cilantro and hot sauce, and if you want - although traditionally not included- a little vegan cheese, and you've got a taco party on your hands. Let's eat!
INGREDIENTS:
French Fries 3 medium russet potatoes, cut into french fries OR about 3 cups of your fave frozen french fries 1 tablespoon coconut oil (only if making your own fries) salt to taste Meaty Crumbles 2 cups Beyond Meat Beefy Crumbles (or faux meat of choice- like in our jackfruit asada tacos!) 1 tablespoon coconut oil 1 teaspoon cumin 1/2 teaspoon cayenne pepper 1/2 teaspoon smoked paprika 1/4 teaspoon chili powder 1/8 teaspoon salt Everything Else 1 lime, quartered 1 avocado, pitted and sliced 1/4 cup chopped onions 1/4 chopped cilantro corn tortillas hot sauce + salsa, to taste vegan cheese for sprinkling (optional) DIRECTIONS: French Fries Preheat oven to 400 degrees. If you're making fries from scratch, wash your potatoes well and slice into into fries about 1/4 inch thick. Coat a baking sheet in the 1 tablespoon of coconut oil, then spread your potatoes or frozen fries onto a baking sheet and bakes until golden and crispy, about 30 minutes, flipping halfway through. Set aside. Meaty Crumbles Pour meaty crumbles and coconut oil into a cast iron pan over medium heat. Add in cumin, cayenne pepper, smoked paprika, chili powder and salt. Stir well to evenly coat the crumbles in spices, and cook over medium heat until the crumbles are heated through and smelling delicious. Everything Else While the meaty crumbles + fries cook, prepare the rest of your ingredients; Slice the lime, avocado, and onion and chop the cilantro. Heat a separate cast iron pan, or pop the tortillas in the oven for a few minutes to heat warm them. When they're ready assemble the tacos starting with 2 layered corn tortillas, then top with beefy crumbles, fries, avocado, onions, cilantro and as much lime + hot sauce or salsa (or both) as you like. If you're adding a sprinkle of cheese, toss that on too. Leftovers can be refrigerated up to a week, but the corn tortillas should be heated fresh for each meal (duh). Enjoy! Makes 4-6 tacos. San Pedro Style Fish-less Market Tray
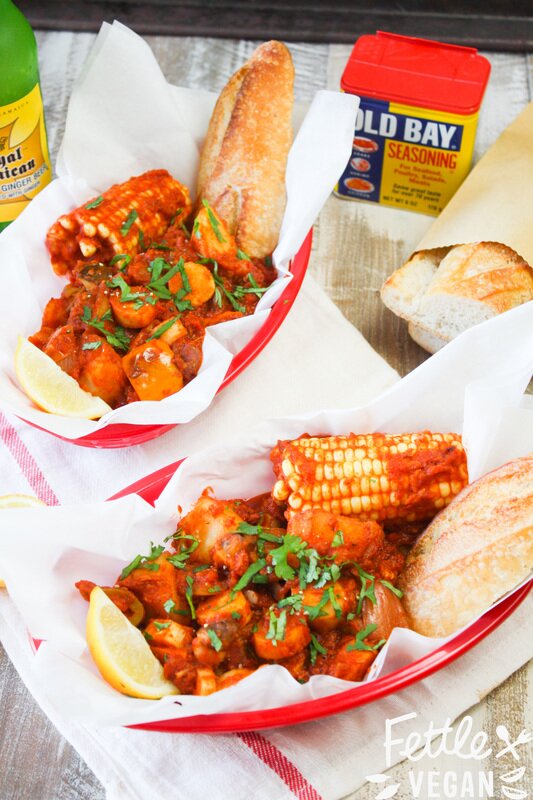
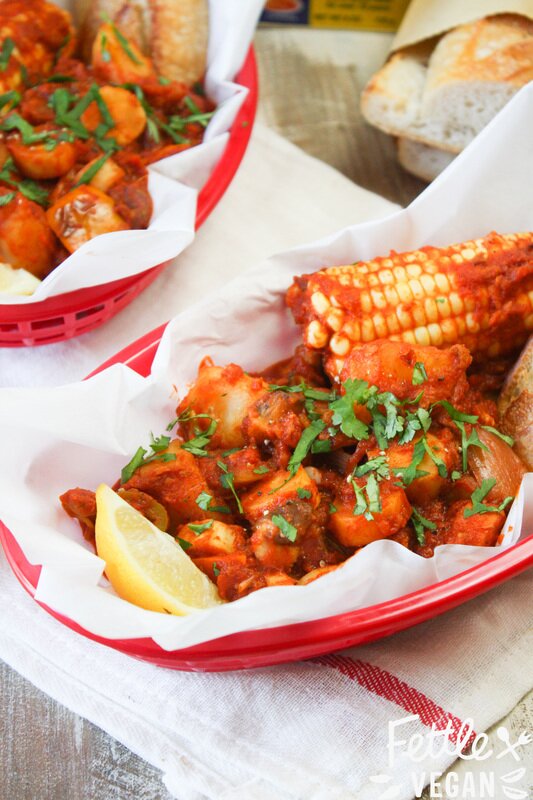
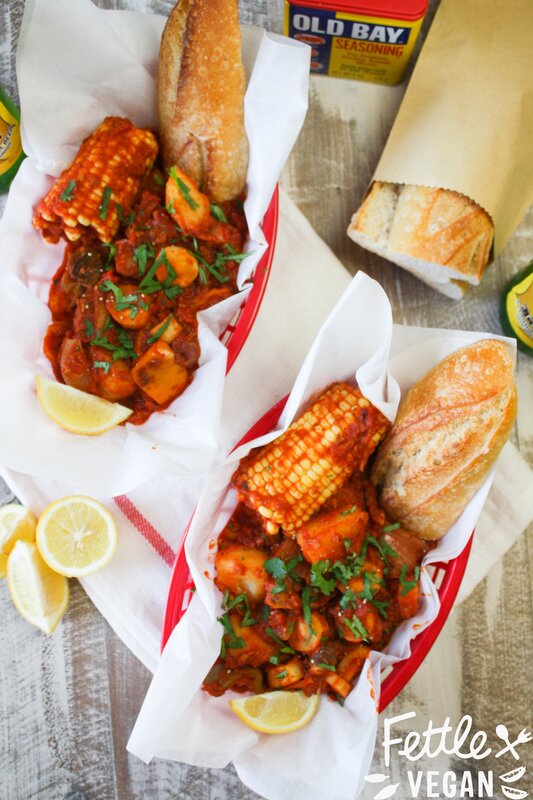
It's Alex. I grew up in Southern California and my grandparents live in the South Bay area. As a kid, we would visit the San Pedro Fisherman's Wharf to eat tons of seafood and to watch the scary-huge cruise ships lumber by as often as we could. The fish market sells all kinds of seafoods by the pound, but the thing everyone really comes for - and a favorite of ours - was the Famous San Pedro Shrimp Tray. The meal is served on a big plastic tray (like from a food court), covered in newspaper, and topped with an overflowing mixture of shrimp, potatoes, onions, peppers, tomatoes, and corn smothered in a spicy, delicious tomato-based sauce that you could sop up with the crusty toasted bread served on the side. The veggies and sauce make the whole thing, and we thought it would be super easy to sub out those little crustaceans with some healthy plant foods. We were right! We replaced the shrimp with seasoned hearts of palm and mushrooms, which both taste similar to and have a texture similar to the original- but you know, vegan. This hearty meals serves 4 or leaves you with leftovers, but you won't mind. We recommend serving it alongside a crusty baguette and with a squeeze of lemon. Let's eat!
INGREDIENTS
Marinade: 1/2 cup white cooking wine 2 tablespoons lemon juice 1 1/2 teaspoons Old Bay seasoning 1/4 teaspoon black truffle sea salt (regular sea salt works here, too) 1 - 14.5 oz can hearts of palm, drained 1 1/2 cups mushrooms (we used shiitake, but oyster or lobster mushrooms would be great, too!) Sauce: 2 - 6 oz. cans tomato paste 6 oz. soyrizo (soy chorizo), optional - but worth it 2 cloves garlic, minced 1 cube vegetable boullion 2 teaspoons chili powder 1 teaspoon cayenne pepper 1 teaspoon smoked paprika 1 teaspoon old bay seasoning 1/2 teaspoon cumin 1/4 teaspoon black truffle sea salt (or regular sea salt) 1/4 teaspoon black pepper 3 cup water Everything Else: 1 tablespoon oil 2 large bell peppers, seeds removed + roughly chopped 2 medium onions, roughly chopped 4 medium red potatoes, cut into 1-2 inch cubes 2 cobs of corn, halved 1 tomato, roughly chopped cilantro, for garnish (optional) DIRECTIONS To make marinade, combine white cooking wine with lemon juice, Old Bay and salt. Drain hearts of palm and slice into 1/2 inch circles. Roughly chop mushrooms and places 'shrooms and hearts of palm slices into the marinade. Let marinate at least 1 hour, or as long as overnight. While marinade comes together, make the sauce by whisking together tomato paste, soyrizo, mixed garlic, vegetable boullion cube, spices and water in a large bowl. Set aside. Heat oil over medium heat in a large cast iron skillet. Cut bell peppers, onions, red potatoes, corn, and tomatoes. Place corn and potatoes into a medium pot and boil until fork tender. Add bell peppers, and onions to pan with heated oil and cook until they begin to soften, about 3-5 minutes. Add in the cooked corn coblets, potatoes, and tomatoes and cook all together, stirring occasionally, for another 5 minutes. Add sauce mixture to the pan and stir tom combine. Simmer for 15 minutes. While veggie + sauce mixture simmers, pour the hearts of palm and mushroom marinating mixture into a medium sized pan and cook over medium heat until leftover marinating liquid reduces and thickens. Remove from heat, add to sauce + veggie mixture and stir to combine. Cook for another minute or two, until mixture is a bit soupy and everything is well combined. Serve with crusty bread and a squeeze of lemon. Leftovers last in a sealed container in the fridge for up to a week, but may need a little water added when reheating because the sauce will thicken as it cools. Serves 4-6.
print recipe
Vegan Fluffernutter Sandwich!
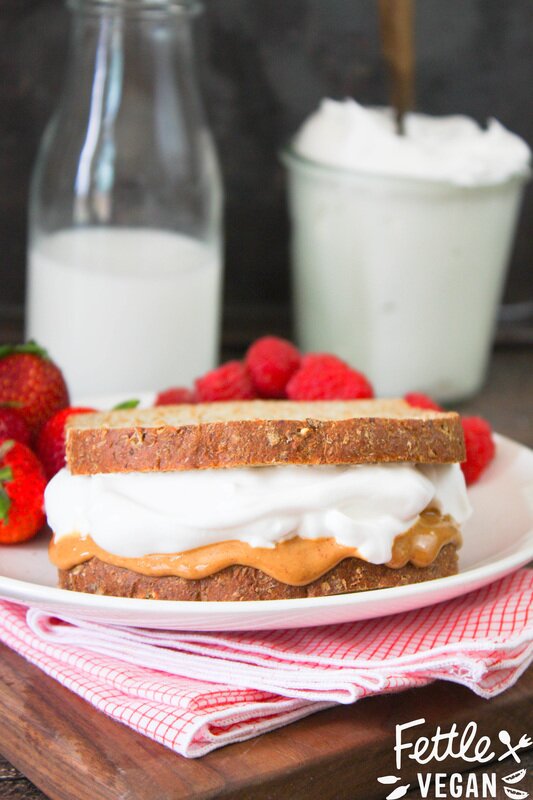
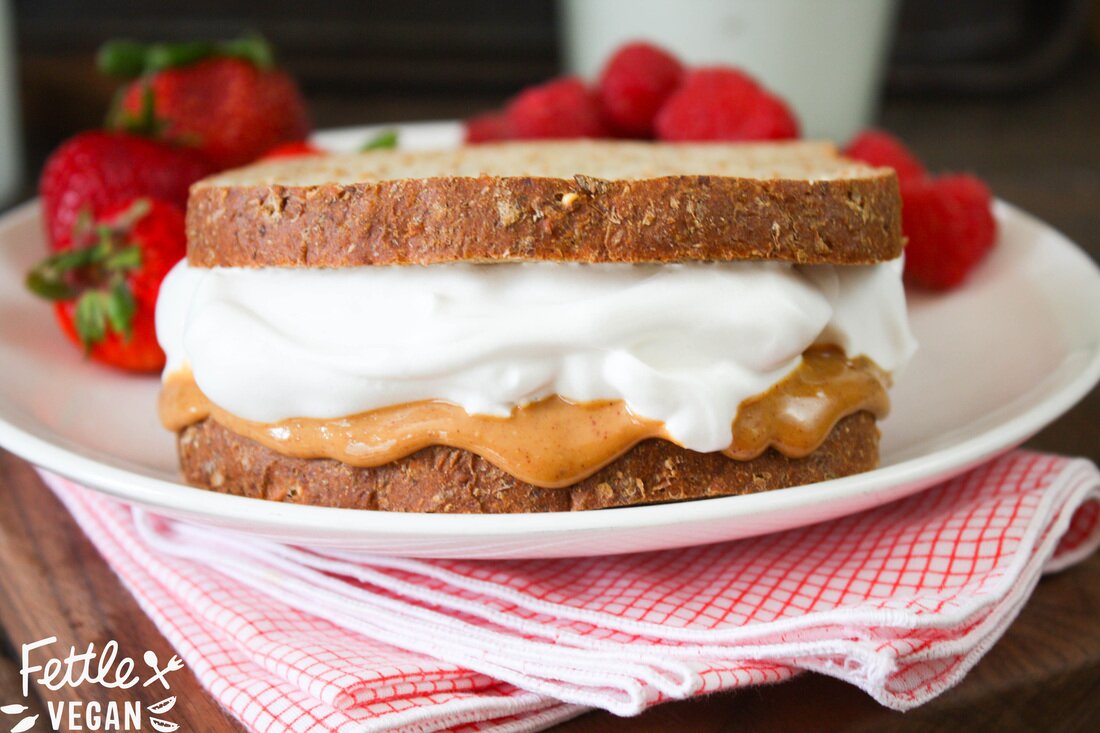
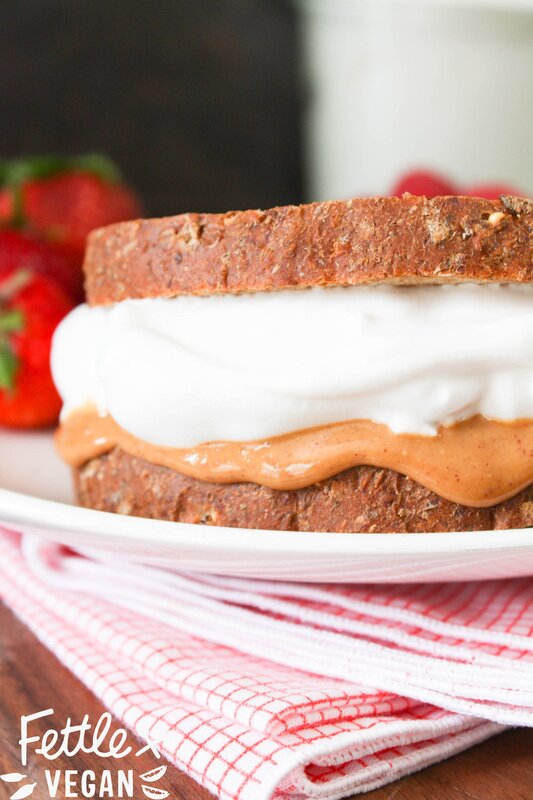
I grew up in a tiny town in Southern Maine. My mom usually packed our lunches for us and did a great job- but we always wanted Dad to do the packing. When Dad packed lunches, my little sister, Jade, and I would always get a fat fluffernutter sandwich on whole wheat bread, sliced into 4 triangles and wrapped in aluminum foil. We'd open up the gooey, tin foil wrapped sandwich at lunch and bury our faces into the marshmallow-y goodness. Now, if you've gotten this far and you're still like "WHAT THE HELL IS FLUFFERNUTTER?" then you obviously didn't grow up on the East Coast. A fluffernutter is a combo of peanut butter and marshmallow fluff, slathered into sandwich form. I remember eating these CONSTANTLY (I wasn't much into jam) as a kiddo, and haven't had one in YEARS. Especially since, as a vegan, marshmallow fluff (while it DOES exist) can be hard to find and expensive to buy. Luckily, the world of vegan food experiments in now a pretty wide world.
If you've been living under a rock, you may not have noticed the trend sweeping the vegan community, but it's all about bean juice and it's called aquafaba. Aquafaba is the term used to describe the thick liquid you usually pour down the sink when draining a can of beans (any kind of beans- black, garbanzo, navy beans- will work). Some brilliant genius realized you could whip the liquid (similar in protein build) just like egg whites and get similar results in things like meringues, pavlovas, and marshmallows. Only now, they're VEGAN versions! When we first heard of this idea, we immediately drained a can of beans and got to work. We loved how similar the texture of the 'fluff' was, though it was slightly less sticky than what I remember (and thus easier to wipe off your face afterwards), but that's probably due to the lack of corn syrup in this recipe. Aquafaba is a crazy, fun thing to experiment with, and I have found myself thinking of ways to add it to EVERYTHING. It just adds a light, whipped quality that I think would be AMAZING in baked goods. Before that though, whip up this easy, basic fluff recipe, make yourself a fluffernutter sandwich, and put Blossom on Netflix for a total afternoon revival of my East Coast childhood. Let's EAT!
INGREDIENTS:
1/2 cup aquafaba liquid (about 1 - 15 oz. can beans, drained) 1 teaspoon vanilla 1/2 cup organic, granulated sugar 1/8 teaspoon xantham gum 1/8 teaspoon cream of tartar peanut butter (about 1/4 cup per sandwich) sliced wheat (or white) bread, 2 slices per sandwich DIRECTIONS: 1. Drain aquafaba from one can of beans into a small bowl. Refrigerate unused beans. 2. Strain aquafaba liquid through a piece of cheesecloth or fine sieve to remove any beans pieces or skin. 3. Pour aquafaba into an electric mixing bowl, and begin to whisk at a medium to high speed. 4. As aquafaba whips, slowly add vanilla, granulated sugar, and finally xantham gum + cream of tartar. Whip mixture 10-15 minutes, until stiff peaks form. The mixture should be thick enough that if you remove the whisk attachment and wave it around the air a bit, the 'fluff' should't go anywhere- kind of like the blizzard trick at Dairy Queen. 5. Assmeble your sandwich by spreading 1 slice thickly with peanut butter and the other slice with a generous serving of fluff. Slap the two slices together and munch away! Makes enough for 2-4 sandwiches, though there is so much that can be done with aquafaba, the leftovers might be great as a meringue topping or mixed into baked goods. Leftovers can be refrigerated in an airtight container for up to 3 days, but may need to be re-whipped before consumption. NOTES: - About 3 tablespoons of aquafaba= 1 'egg white' - Any bean liquid should work, but we used canned white bean and chickpea liquid over here. -Experiment! This new trend has lots of possibilities and is super fun to work with. Just don't get frustrated! -You can find more info on aquafaba hits + misses in this AMAZING Facebook group OR at aquafaba.com.
print recipe
Peanut Butter + Berry Acai Bowl
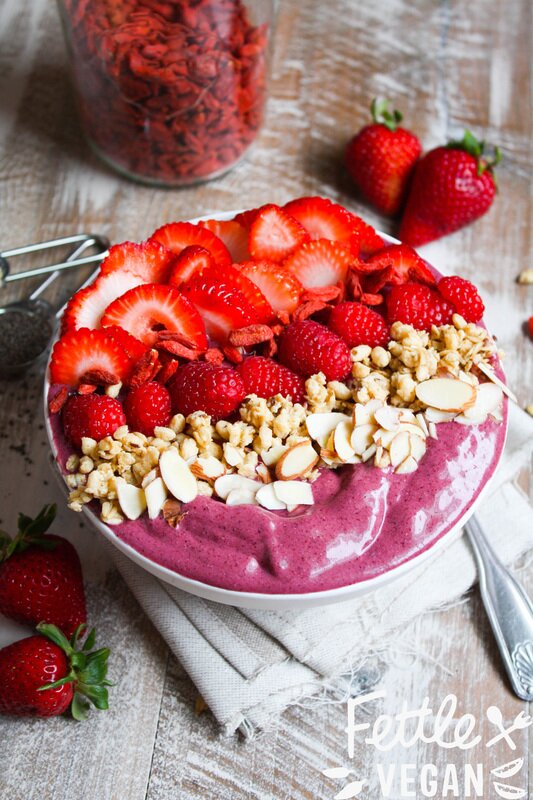
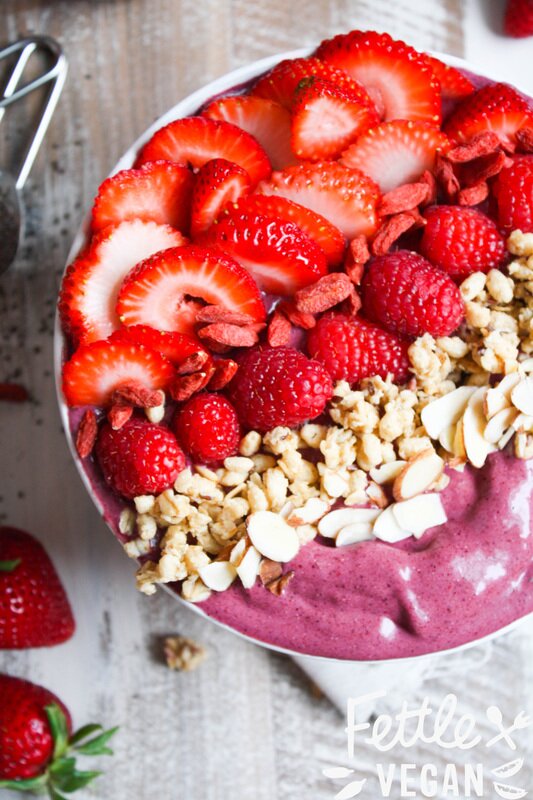
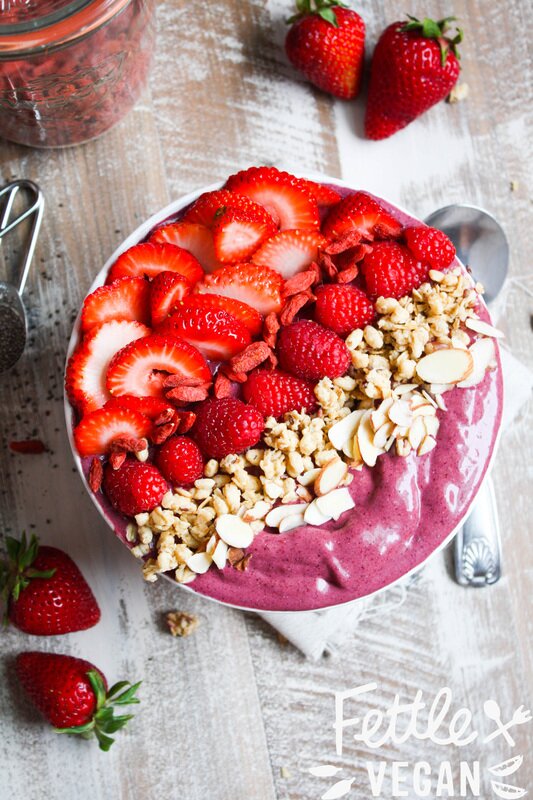
The weather has given us a very early summer growing season here in Southern California, and I've been on a real fruit kick. There's just something magical and so right about eating ripe, juicy fruit when the weather is warm! Whipped into smoothies, pressed into juice, sliced on top of my oatmeal- I'll eat it all, friends. And sometimes though, you realize that something you've been buying all along can be made in your own kitchen more cheaply and easily than running to the juice bar to get it! Combine my love for fresh summer fruit with my sheer laziness about driving across town to the juice bar, and you get this sweet gem. This is a copycat recipe I came up with of Nekter's PB Bowl, a little more balanced and without the added agave. It is way cheaper to make at home (like WAY cheaper), and allows you some portion control if wanted and a freezer to keep it in if you have leftovers. And the best part? It tastes like a peanut butter and jelly sandwich- but you know, in spoon form! I like to top it with lots of extra berries, granola, nuts, and chia seeds, but we'll offer some other fun ideas below. And really, these bowls are super easy to tweak to your preferences, so have fun experimenting with different flavors. I also really like throwing in some pineapple, peach, or mango to sweeten it up a bit. Whichever way you do it, it's bound to be delicious. Let's eat!
INGREDIENTS
1 acai smoothie pack (we use 100g Sambazon packs + can find them in most grocery store freezer sections) 8 ounces coconut water OR dairy-free milk 1 cup fresh or frozen strawberries 1 cup fresh or frozen mixed berries (OR you can sub 1 banana for 1/2 cup of berries here if you like!) 2 tablespoons peanut butter (or any other nut butter) fresh fruit + granola, for topping optional add-in's: (about 1-2 tablespoons each) ground flax chia seeds hemp seeds protein powder goji berries maca lucuma nuts coconut cacao nibs agave DIRECTIONS Blend up all your ingredients in a high speed blender until thick and well combined. Scoop mixture into a bowl and top with fresh fruit, granola, and any other delicious toppings you'd like! Enjoy immediately and freeze leftovers. Makes 1 large smoothie bowl.
print recipe
Jackfruit Asada Street Tacos
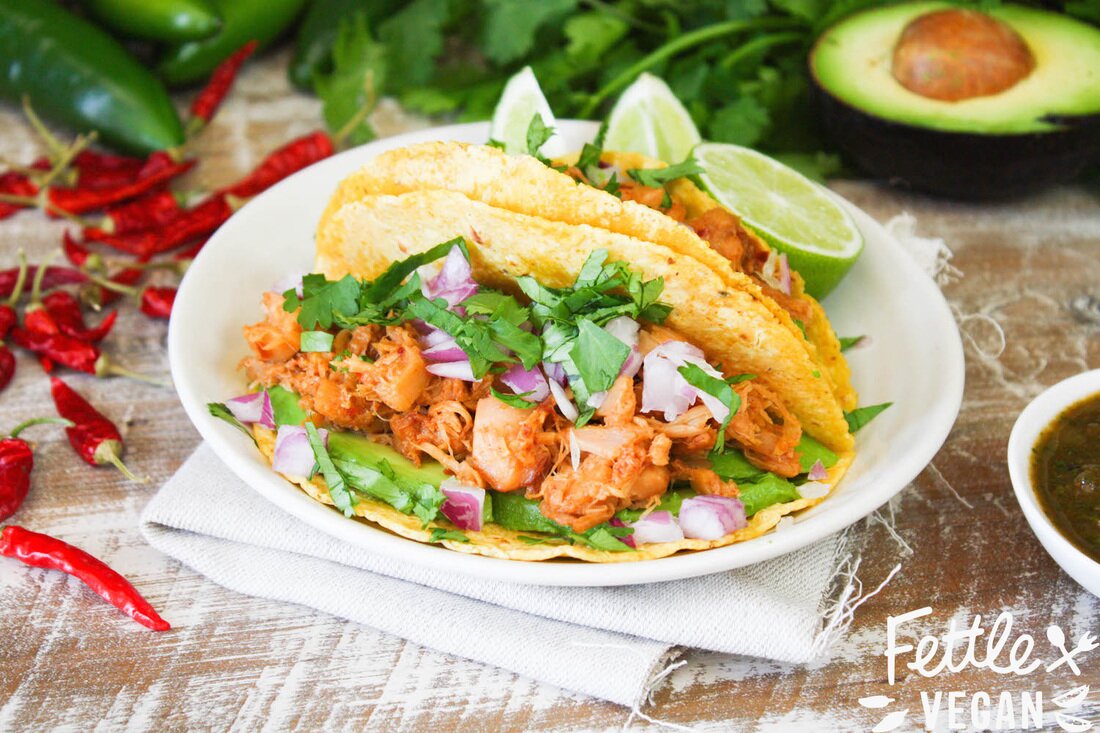
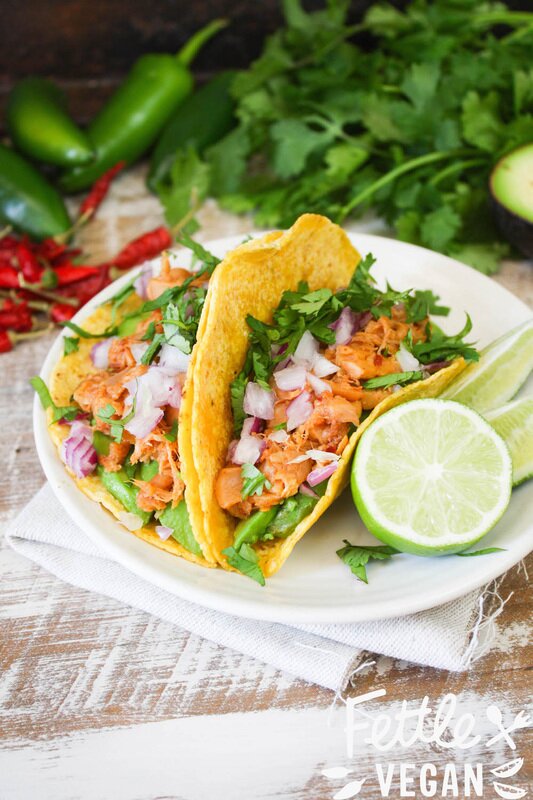
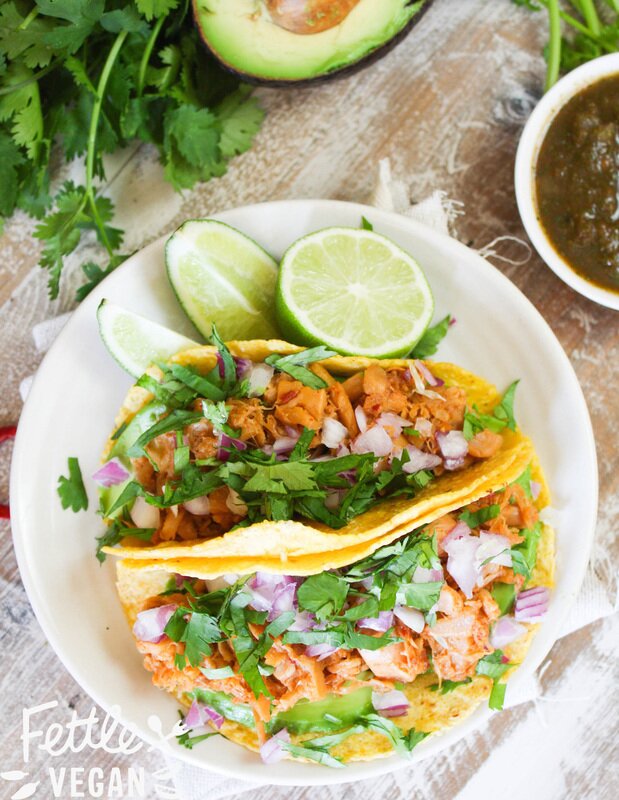
Here in Southern California, it's all about the food. We're surrounded by great local restaurants and tons of farmers markets. We're lucky to live a place where fresh produce, great weather, and a melting pot of diversity has also attracted some amazing chefs- its a culinary adventure living out here. That being said, there is almost no better food I've ever eaten here than a traditional Mexican street taco. There's an art to the simple street taco: the meat has so much great flavor cooked into it you don't need much for toppings- a sprinkle of onions, cilantro, and a squeeze of lime. Avocado, cabbage (if you have it), and salsa are great additions, too. And tomorrow, street tacos will be in high demand...that and margaritas, of course- it's Cinco de Mayo! Since we've gone vegan, we eat a lot less (okay, no) traditional street tacos (you know- the whole meat thing), but we really love the traditional carne asada- grilled meat- flavor, so we've just started making our own. Turns out, a kitchen taco can be just as good as street taco. Who knew?! The jackfruit makes a great substitute for carne asada because of it's meat-like texture when shredded and ability to take on the flavor of whatever it's seasoned with. You can find jackfruit at your local Asian market or online. These babies whip up quick and are easy to make in bulk for Cinco de Mayo parties or for Taco Tuesdays any week of the year. Let's eat!
INGREDIENTS:
1 tablespoon coconut oil, for frying 1- 20 ounce can (10 ounces, drained) Jackfruit in brine or water (NOT syrup), seeds removed 1 orange, juiced (about 1/3 cup juice) 1 lime, juice (about 2-3 tablespoons juice) 2 cloves garlic, minced 2 tablespoons melted coconut oil 2 teaspoons soy sauce 1 teaspoon liquid smoke 1/2 teaspoon cumin 1/2 teaspoon smoked paprika 1/2 teaspoon red pepper flakes 1/2 teaspoons salt 1/4 teaspoon cayenne pepper organic corn tortillas 1-2 avocados, pitted and thinly sliced 1/2 cup red onions, diced 1/4 cup cilantro, roughly chopped lime slices, for garnish DIRECTIONS: In a medium cast-iron skillet, heat 1 tablespoon coconut oil. Place jackfruit into a mixing bowl and use two forks or your fingers to shred it. Add orange and lime juice, garlic, coconut oil, soy sauce, liquid smoke, cumin, smoked paprika, salt and cayenne pepper. Mix until jackfruit is well coated, then pour the whole mixture into the heated skillet. Cook over medium heat about 10-15 minutes, until juices thicken and reduce and jackfruit begins to slightly brown in pan. While jackfruit cooks, prepare the avocados, red onions, cilantro, and lime. Heat a large flat skillet over medium heat and warm tortillas on the skillet until warm, flipping once. When the jackfruit asada is ready, pile some into a (or double) warmed corn tortillas, then top with a few avocado slices, onions, cilantro, and a squeeze of lime. Enjoy! Makes 4-6 tacos.
print recipe
Looking for more Cinco de Mayo inspired recipes? Check out our Caulifower Queso Cheeze, Baked Jalapeño Poppers with Cilantro Lime Mayo, and Mexican Chickpea Scramble!
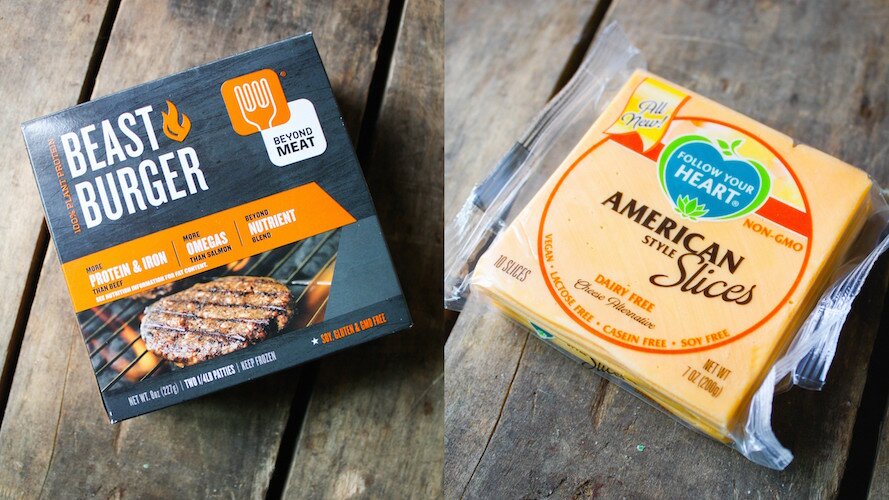
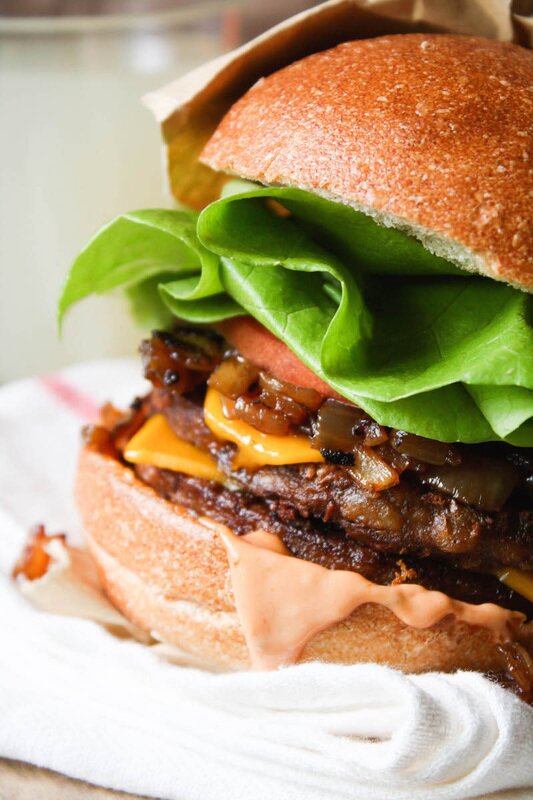
In-n-Out Copycat Recipe:
|
tagsAll  RSS Feed RSS Feed
|


